In the plan that is offered here you can find drawings to help you make two variants of sliding lid boxes.
The only difference between them is the type of woodworking joints we used to form the box: on one we used box joints (or finger joints) and on the other, spline miter woodworking joints.
A characteristic of sliding lid boxes is the closing method that is made possible by groove and tongue woodworking joints. The bottom of the box is also attached to the sides of the box by means of the above tongue and groove joints. Beginners may have difficulty cutting the groove because it is very easy to damage the lower finger of the box joints. There are two ways to avoid this problem, and we have applied both:
- rout a stopped groove that would not interfere with the joinery;
- cut wider the fingers of the box joint.

Before embarking on making your box, consider what exact size you need. The box dimensions in our plan are as follows: 254mm (10'') x 89mm (3.5'') x 63.5mm (2.5''). In case these dimensions don’t suit you, carefully study the drawings and adjust the box parts to desired dimensions.
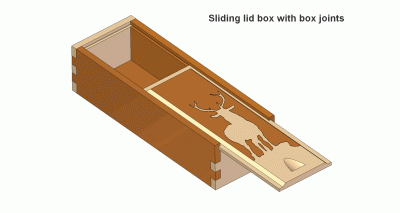
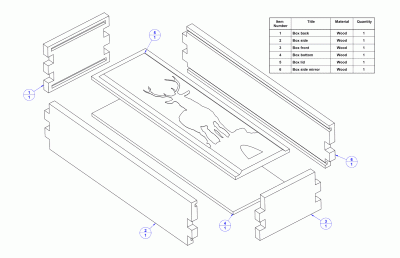
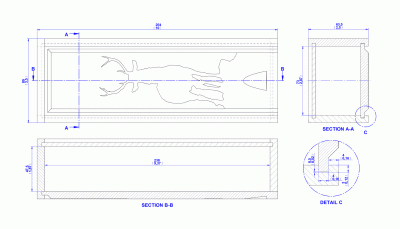
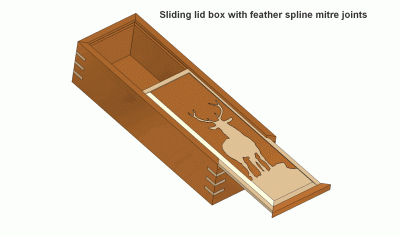
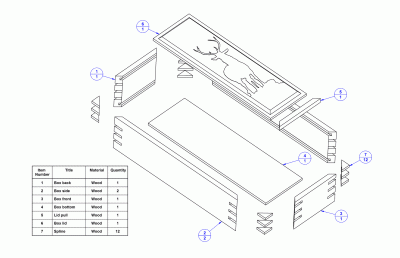
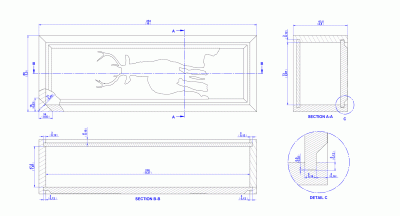
To emphasize the beauty of the boxes, we have drawn a lid as if on it there were a deer pattern in marquetry technique. The deer pattern can be downloaded here: Deer vector silhouette
The boxes can be made from a large number of types of wood, but if you want to get quality decorative boxes, use hardwood and carefully choose the stocks to have the finest texture possible.
After all of the parts have been made, dry-fit all parts, put the complete box together without glue to check for accuracy and good-fitting joints. If anything needs refitting, now is the time to correct it. When satisfied, glue the joints and assemble the box.