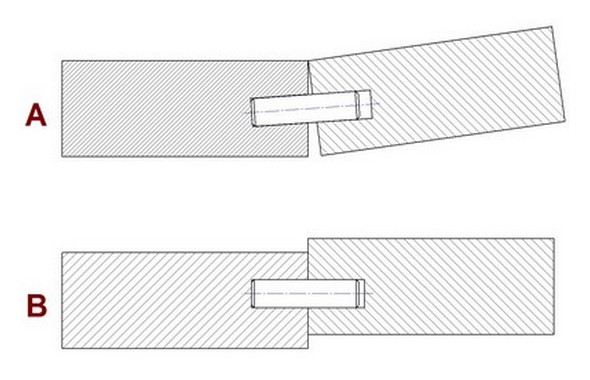
Dowels are round wooden pins of small diameter used to strengthen (reinforce) a butt joint.
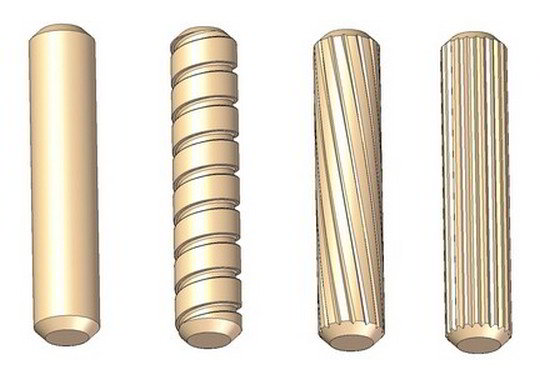
They can be bought ready made and can be used instead of nails or screws, or instead of mortising, dovetailing, etc. They should be dipped in glue and driven at a tight fit into holes made for their reception. Dowels may be made at the bench by the plane, or they may be turned. When planed, they will be improved in section if driven through a round hole in a piece of steel. They are supplied by the trade, of all ordinary diameters and lengths.
While this joint is very simple in construction, it is not easy to make; and before a beginner uses it on any practical work, he should try it on two pieces of scrap lumber. The utmost accuracy is necessary in marking the centers of the holes and boring them, if satisfactory results are desired.
As compared with a mortised joint, when used upon common doors, the dowel is not so satisfactory as the mortise, because the tenon reaches through the stile, and the glue, collecting at the joint as the pieces are brought together, makes a stronger connection there than at the end of the tenon at the outside of the stile; therefore when the stile shrinks, it usually holds at the joint, and its outside edge draws toward the joint, allowing the end of the tenon to project beyond the stile the amount of the shrinkage. In a doweled door, the joint would probably open. If a door which is exposed to the weather is properly doweled, it will stand better than a mortised door in which the tenon passes through the stile, since in the latter case, the moisture will quickly find its way into the end of the tenon, and the door will be rapidly destroyed. The mortises of an outside door should be of the type known as "blind" or "fox wedging", as in this way the end of the tenon is protected from the weather.
When used upon furniture and other work which is set up in a warm shop, and when made of thoroughly kiln dried lumber, a properly made doweled joint is perfectly satisfactory.
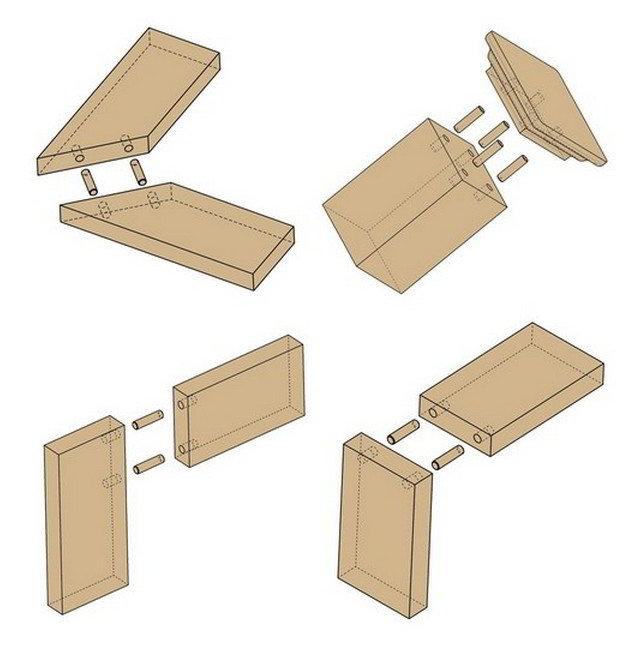
Uniting with dowels
Plane the surfaces of the blocks until perfectly flat, test them by bringing the surfaces in contact, and note whether they touch all around. The dowel joint is a weak one, and, unless the surfaces are flat and brought in close contact, the dowels will be of no service in holding the pieces together.
A beginner often makes the mistake of leaving a slight error in fitting and expects the clamps to squeeze the edges together. This can actually be done with softwood; but such a correction is only temporary and the bad joint is sure to open up later on, after the clamps have been removed.
Marking for dowels
Method 1.
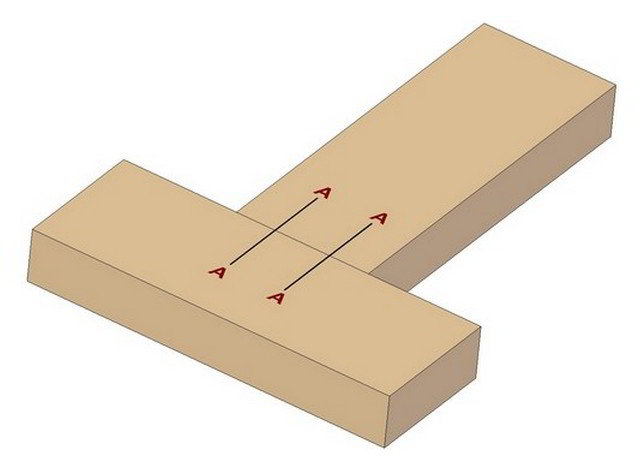
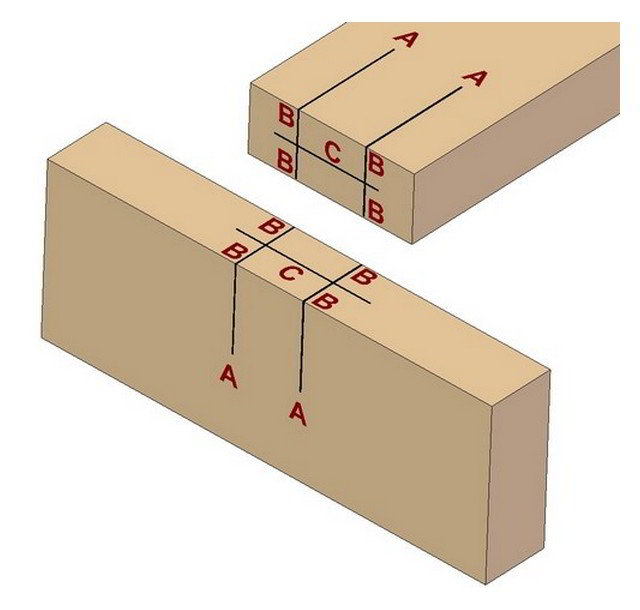
The principal application of this method is in doweling the joints of a wide board.
- Place two pieces in the exact relative positions that they are to occupy permanently.
- Make a pencil mark across the joint upon the faces of both pieces at once, as at AA.
- With either a pencil or knife, square across both edges of the joint from the marks, as at BB.
- With a sharp gauge, make mark C, whic crosses BB. The intersection of these two lines gives the center of the hole.
- A scratch awl should be used to make a small hole at the above described point, so that the bit will enter accurately, as otherwise it is apt to enter a little to one side of the intersection, or to follow the grain.
Method 2.
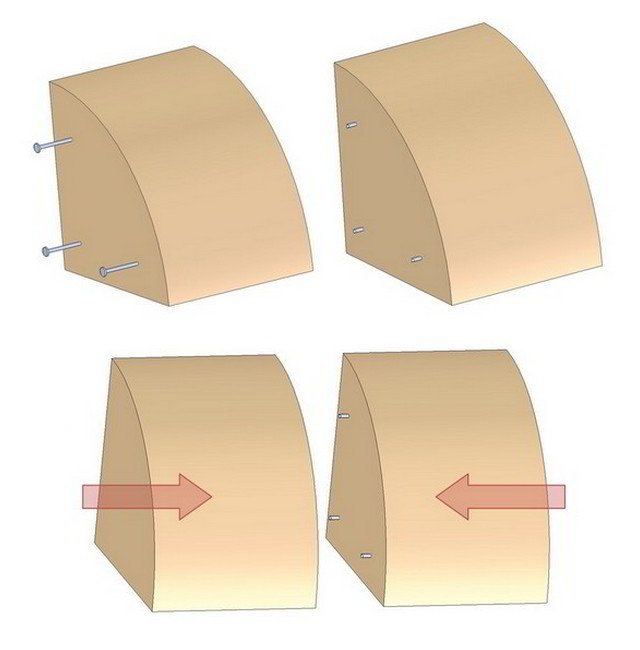
This method of marking for dowels is sometimes used when it is not practicable to use method 1, as in doweling irregular forms.
- Drive small brads, straight into the end of piece A.
- Cut off the heads of the brads at about 3 - 4mm from the wood.
- Move piece B against A, being careful that the outsides are in just the right relation to each other, and apply enough pressure to make the brads leave imprints, in the end of piece B. These are the centers of the dowel holes.
- Pull the brads out of piece A; the holes thus made are the centers of the dowel holes in that piece.
Method 3.
If it is desired to dowel irregular forms, or to make a number of joints just alike, this method will not give good results and save a great deal of time, but the pieces just alike will be interchangeable.
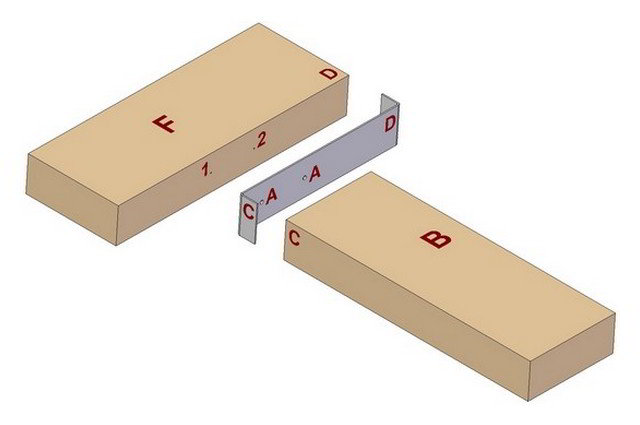
Make a templet of pasteboard; or, if it is to be used indefinitely, of steel, and through it prick small holes in the position which will denote the exact centers of the desired dowels, as at A. Place the templet upon the end of piece B, with the corner C of the templet at C of piece B, and flush with the face side; with a pricker, mark through the holes of the templet the centers of the dowels 1,2. Place D of the templet on the edge of piece F, and flush with the face side, so as to coincide exactly with D of piece F. Through the holes A of the templet, mark 1,2 upon the edge of piece F. This method is much used upon large or irregularly shaped work of all kinds, as it permits of accurate work, and needs no tools but the templet and the pricker.
Method 4.
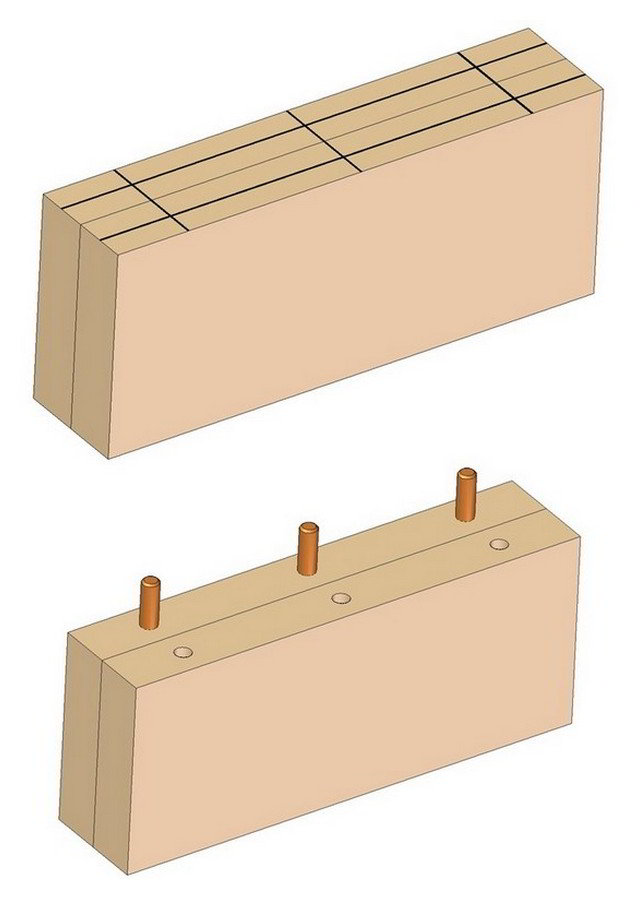
Place the boards to be doweled side by side in the vise, the face sides out, and even the joined edges. Square lines across the two edges with knife and try square at points where it is desired to locate dowels. Set the gage for about half the thickness of the finished board and gauge from the face side across knife lines. At the resulting crosses bore holes of the same diameter as that of the dowel.
Method 5
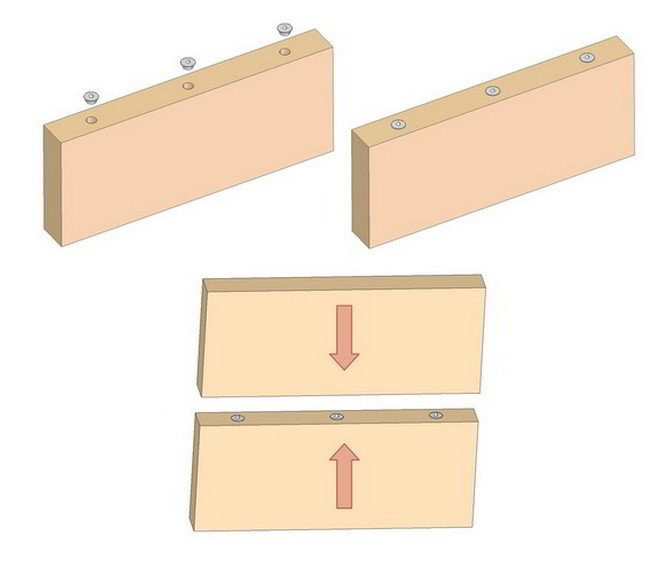
Still another method consists in turning on the late dowel markers (dowel centers). By having a variety of sizes with the centers accurately placed, time may be saved over the methods just described. To use this marker, bore the holes in one of the members, insert markers of the proper sizes and then press this member against the second member.
The dowel pins are prepared next
This can be done best on a turning lathe; but if the shop has no lathe, they can be made by hand. A square stick is first prepared. This is rounded with the block plane, turning the stick with the left hand and planing with the right hand until one half of its length is rounded. The piece is then reversed and the other half is rounded. In connection with this work it is best to try the dowel pin first by boring a hole of the required size in a piece of scrap lumber. The rounded stick should fit tightly by light driving. When finished, the stick is cut into the proper lengths and the ends are slightly chamfered so that they will enter the holes without wedging.
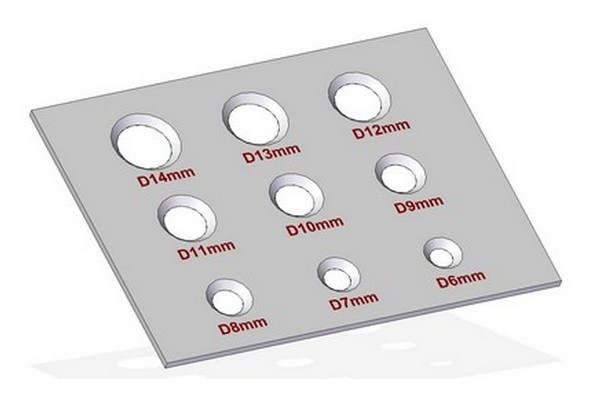
An appliance called a dowel plate is often used for making dowel pins, and is very useful. It consists of a steel plate with holes of various sizes bored through it. The edges of the holes are countersunk so that they have a sharp edge on one side of the plate. The dowel stick is partly rounded and then driven through the hole in the plate. The edges of the steel plate scrape off the remainder of the waste material and make the dowel stick round.
Gluing the dowels
Before gluing, the work should be fitted together, as it is very awkward to make changes after beginning to glue. If the parts fit accurately take the joint apart, glue around the inside of one of the holes with a small stick, dip one end of a dowel in the glue and drive into place. Wipe off any superfluous glue and repeat the process with each of the dowels in that half of the joint. Leave to dry. Then see that there is no hardened glue on the dowels or on the faces of the joint, and glue them as before into the other piece, this time putting glue on the flat surfaces which are to come together. Clamp the whole firmly and leave to dry.
It should be clamped at points about 150mm apart. The clamps should pull evenly and not bend the boards side ways. This can be prevented by putting the clamps on alternately first from one side and then from the other.
It is not wise to use a dowel longer than is necessary; one extending from 20mm to 30mm each side of the joint will holds as well as one reaching farther into the edge of the side wood, for the reason that the wood between the joint and the end of the dowel will shrink, and the longer the dowel, the greather the width of wood there is to be affected. A longer dowel may sometimes be necessary in the wide stile of a door, to give sufficient strength to resist the slamming which a door receives. A dowel should be 1 - 3mm shorter than the aggregate depth of the holes which are to receive it, and should be made loose enough to be pushed in with fingers, but not loose enough to fall out or to be rattled around. The ends of the dowel should be chamfered. This allows some of the glue to be forced up between the dowel and the side of the hole, and not all pushed before the end of the dowel, which would be the result if the dowel were square ended; unless the dowel were too loose, in which case it would not have its full strength, as the joint would not be wood to wood.
In boring holes for dowels, it is custom of many workmen to use one of the many forms of bit stops upon the market,in order to insure a uniform depth to all of the holes. This uniformity is necessary, otherwise the dowels will have to be cut to different lengths, which will require care and time to locate in their proper holes while the joint is being glued up, just when every second of time is precious.
Dowels are usually made of hard, strong woods, such as maple or birch. They can be obtained from hardware supply companies at a reasonable price.
Dowelling mistakes
A - Dowels not properly centered
B – Dowel hole not perpendicular
