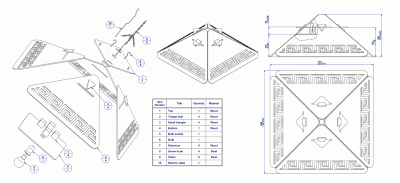
With the woodworking plan that you can download on this page you can make a nice and cheap chandelier.
You can paint the chandelier with various motifs, decorate it using marquetry technique or (as we have done) scroll saw technique. Be creative in choosing the pattern that you will cut in the side part as the light emanating from the bulb will pass through the pattern and thus project it onto the ceiling.

L = 643mm (25 5/16''), W = 643mm (25 5/16''), H = 266mm (10 15/32'')
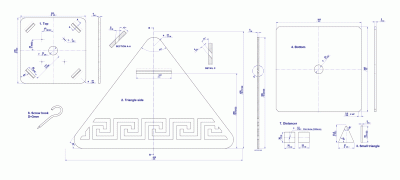
All the chandelier parts are made by cutting from 6mm thick plywood. They are joined effortlessly but effectively, which can be seen in the plan drawings.
There are many types of bulb sockets (do not use cheap bulb sockets) in the market, so you will probably need to adjust parts 1. Top and part 4. Bottom to the bulb socket that you want to install. In our plan we have chosen to attach the chandelier to the ceiling by a chain with intertwined cable that supplies power to the light bulb. If you do not like our way of hanging the chandelier, there are many other ways of doing this. It is always better to leave the electrical work up to a reliable electrician in case you are not skillful enough to do it.
The Chandelier can be finished in a variety of ways to suit the furniture of the room where it is used.


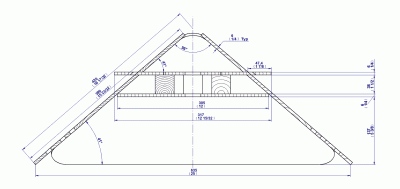
For all those who want to change the dimensions of the chandelier or the slope of its side parts, in the next picture section view of the chandelier assembly is given that will help them in their geometric calculations.
