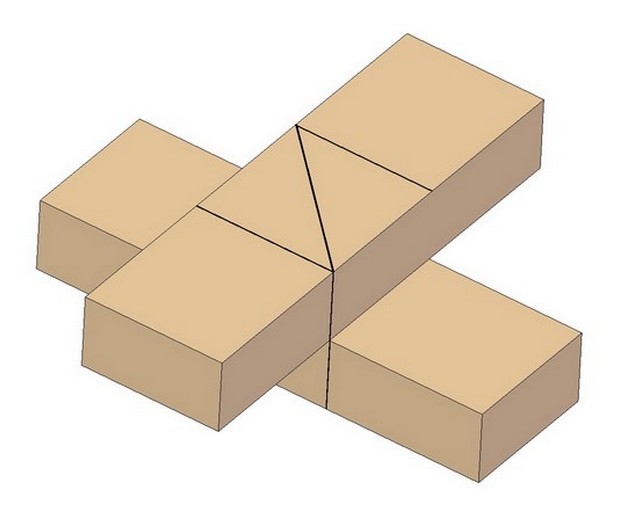
The miter (mitre) joint is one formed by the meeting of two pieces at a corner, on a line bisecting the right angle. A miter joint is a butt joint which has been cut at an angle of 45 degrees.
The same class of joint may be used on angles grether or less than 90 degrees.
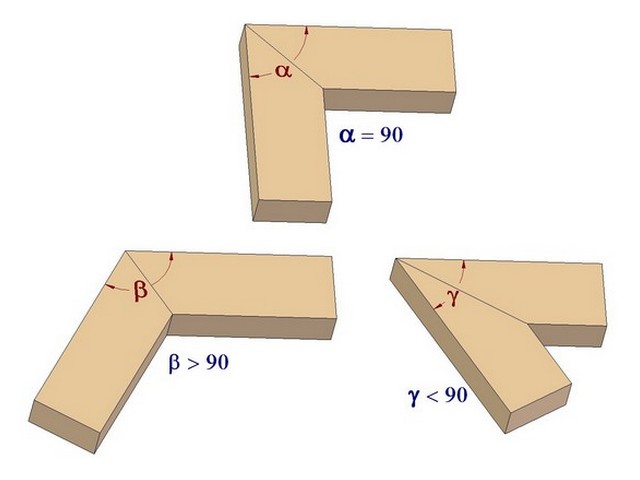
The miter (mitre) joint is extensively used in door and window making, cabinet making, box making, joining of architraves, picture frames, and all sorts of mouldings.
The only advantage of a mitred joint is that it shows only a line at the angle and that the end wood is canceled. The miter joint is not a good joint for wide pieces used flatways, for the wood will expand and contract more or less. Shrinking in width will open a tapering crack from the inner corner; swelling, from the outer corner.
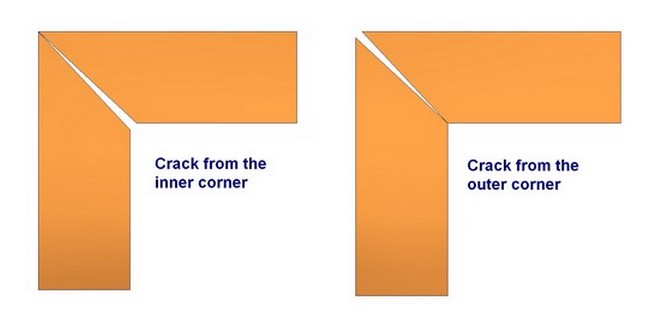
There are some cases, as in making a picture frame of moulding, where mitring is the only way in which the frame can well be put together, but as a rule, particularly where strength is required, avoid the mitre.
A miter joint can be laid out and cut on rectangular stock without the use of a miter box. However, stock with curved edges or surfaces requires the use of the miter box. In any case, the miter joint can be made more quickly and more accurately when a miter box is used.
Marking a miter joint
In making miter jointed frames, etc., take special care to have the face side and face edge straight, square, and out of wind, and then be particular to draw all lines and make all tests from the face side or face edge.
Marking a miter joint - Method 1
Mark with the try square and knife two lines across the middle of the strip from A and E. Measure carefully the length AB, and lay it off on the face edge, to obtain AC, then mark with the knife and blade of the try square, CB. Do the same on the opposite side for the mark FD. From C and D mark lines on the side square with the face edge. Saw very accurately against the lines CB and DF
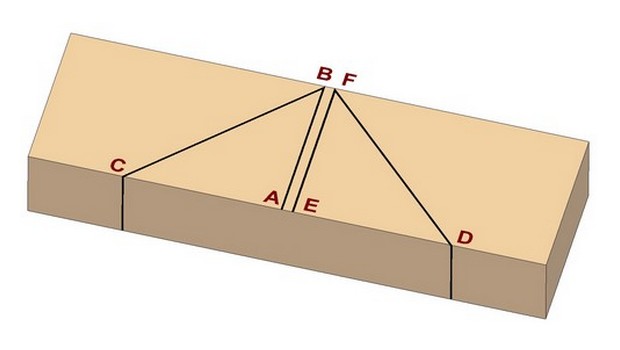
Marking a miter joint - Method 2
The easiest way for the woodworker to get the correct angle is to draw a square at the end of the piece and then draw the diagonal.
The point A is as far from point C as the point B is from the point C, or the distance AC is equal to the width of the piece.

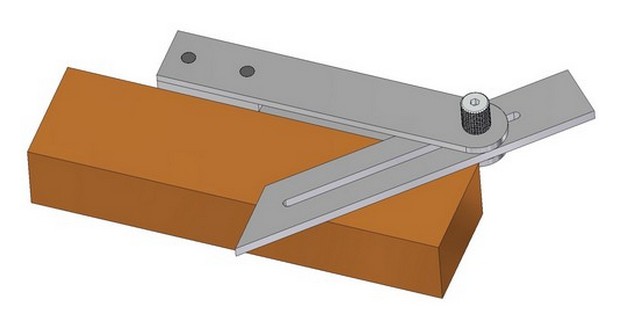
Marking a miter joint with a sliding T bevel
When several miters are to be cut, sliding T bevel may be set to the 45 degrees and the other miter lines drawn with it.
Marking a miter joint - Method 4
To lay out a mitre, or the lines for the meeting of two pieces at any angle, the pieces can be laid one above the other at a desired angle (for which square or bevel can be used), and the points of crossing marked on each edge. Lines connecting these points will give the angles for cutting.
Fastening a miter joint
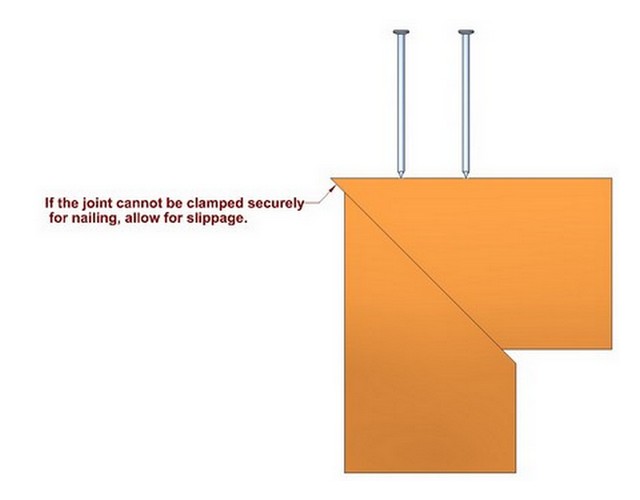
Nails, or nails and glue are often used to fasten a mitered joint. If the joint cannot be clamped securely for nailing, allow for slippage.
The vise can be used successfully for nailing a picture frame joint.
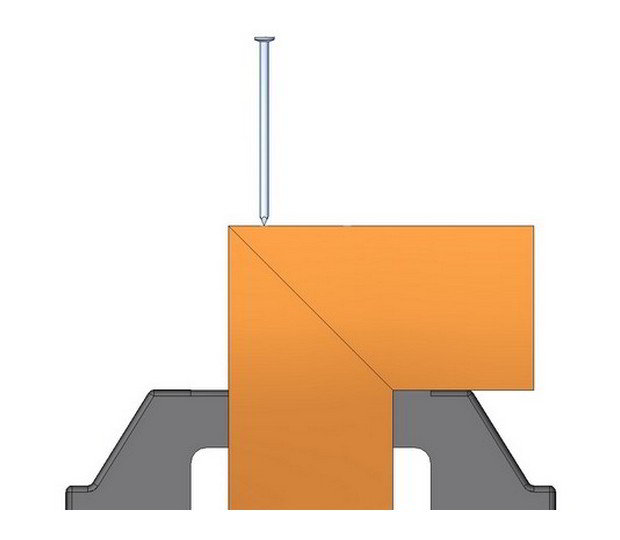
When nailing a miter joint from both sides, place the nails so they will not strike each other and split the pieces.
The mitre joint is sometimes strengthened for box work and the like by fitting a spline or tongue with the grain running across and not lengthways of the joint. This, properly glued under pressure, makes a good joint and one much superior to the plain miter joint.
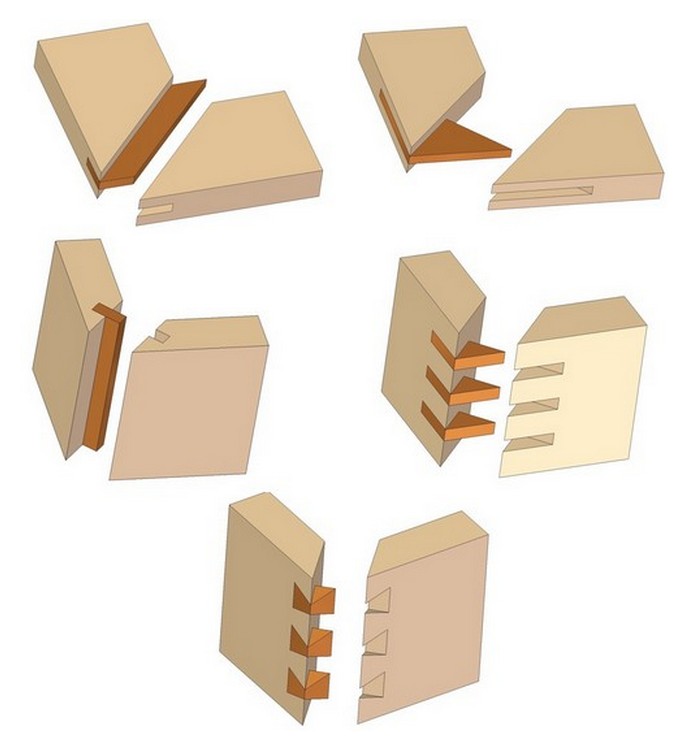
Mitered dowel joint
Dowels with glue are also used for fastening a miter joint.


