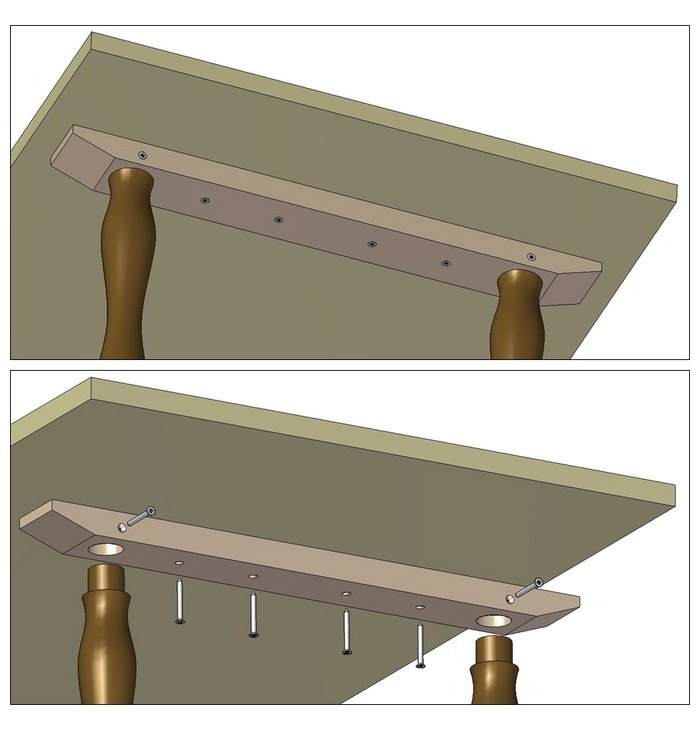
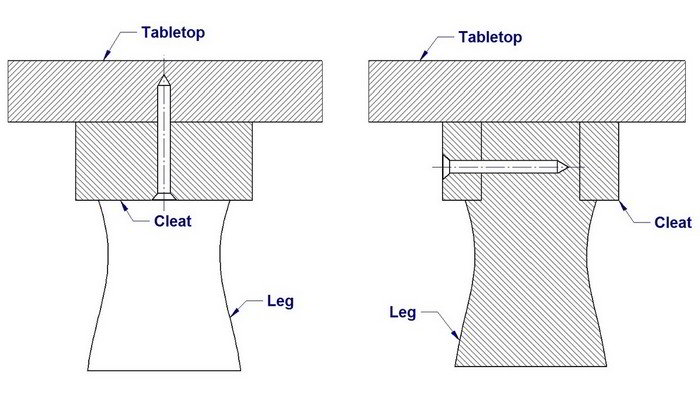
The following illustrations show 17 ways of how to attach the tabletop to the table structure.
We have prepared a 3D view and 2D drawings to make it easier for you to understand how each of the methods really works.
At first, the answer to the question of how to fasten a tabletop to the table structure may seem very simple. Only when we look at the problem a little closer we can see that this is not an easy task. The way in which we should fasten the tabletop must meet several criteria:
- the tabletop must be firmly fixed to the table structure;
- with time, the tabletop must remain flat and undeformed;
- the attachment method shouldn't compromise the design of the table.
Properly installed, a tabletop can contract and expand with changes in humidity while staying flat and firmly connected to construction of the table.
Wood is hygroscopic, which means that it gains or loses moisture from the air, and this is always dependent on the surrounding conditions. If the humidity of air is increased, wood absorbs moisture and thus starts expanding. If, on the other hand, the humidity of air is decreased, wood releases accumulated moisture and starts shrinking. Wood's movement (difference in dimensions due to expansion and shrinking) can be significant (especially for large tabletops). In case that movement is disabled, the tabletop will start to deform and crack. The most dramatic movement occurs acroos the grain. Movement along the grain is so small that it can be ignored. To what degree the movement will occur, depends on the following: width of the tabletop, type of wood, initial moisture content of the wood, range of humidity extremes...
There are two groups of methods to fasten the tabletop to the table structure:
- Free-moving fastening method – allow expansion and contraction of the wood
- Stationary fastening method – keep the tabletop stationary. This method is usually employed where tabletop is of frame construction, made of laminated materials or for smaller tables where the tabletop is not large enough to produce much movement.
- Free-moving tabletop fastening method
1. Button fasteners – As the tabletop expands and contracts, button fasteners are free to slide within the groove. Grooves can be made along the entire apron, or to be slightly longer than the button width. Easy to make and install, it allows movement in two directions (along the apron and perpendicular to it).
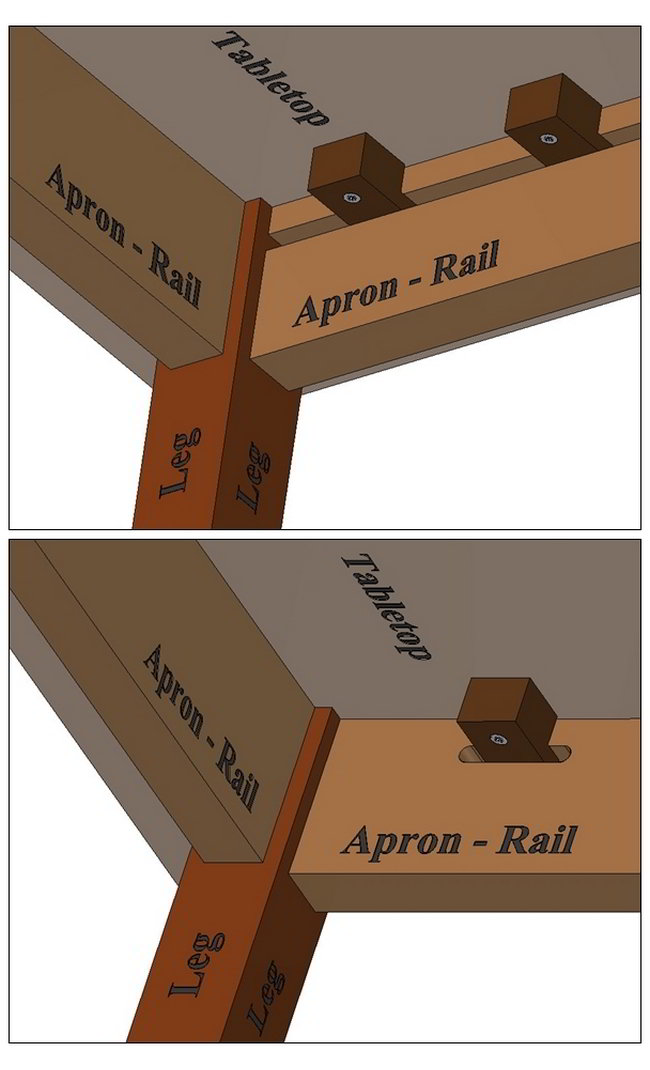
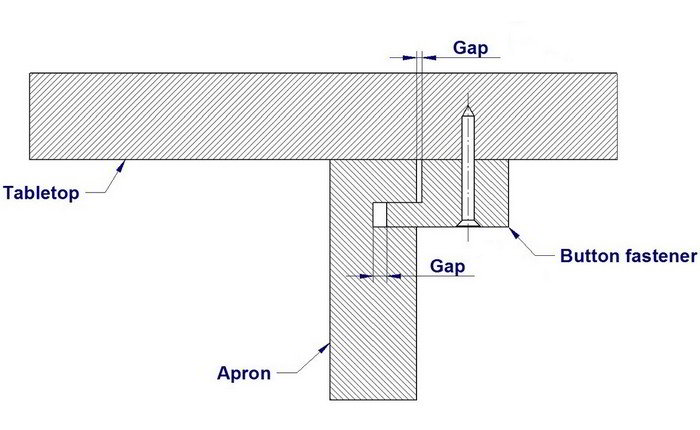
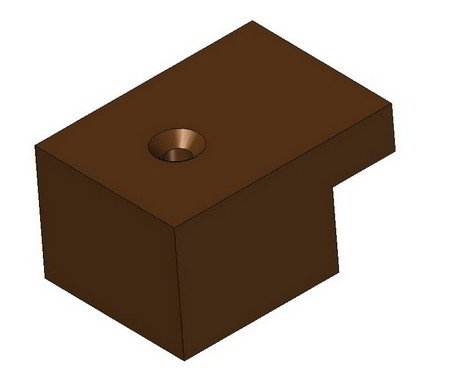
2. Button fastener with kerf – This method is similar to the previous one, the only difference is that the kerf under the working end of the button can be bent up or down. This bending can be very useful if you have a groove made a little higher or lower than it should be. Grooves can be made along the entire apron, or to be slightly longer than the button width.
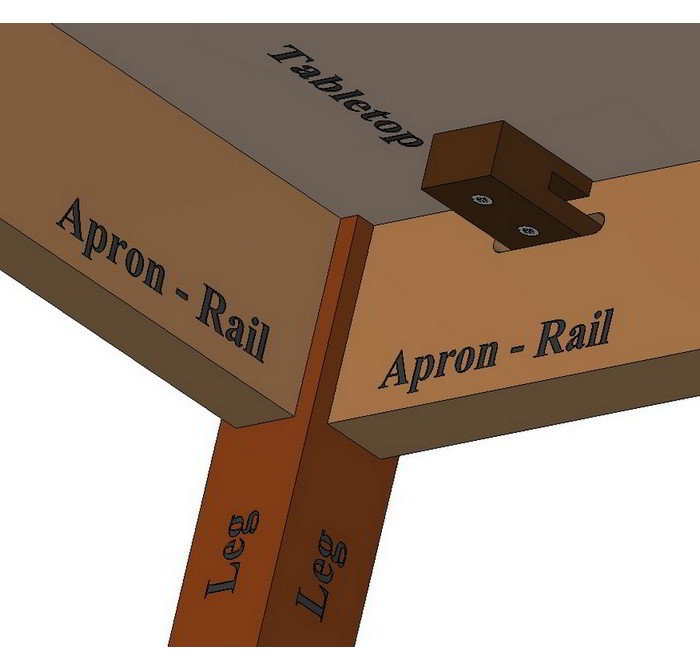
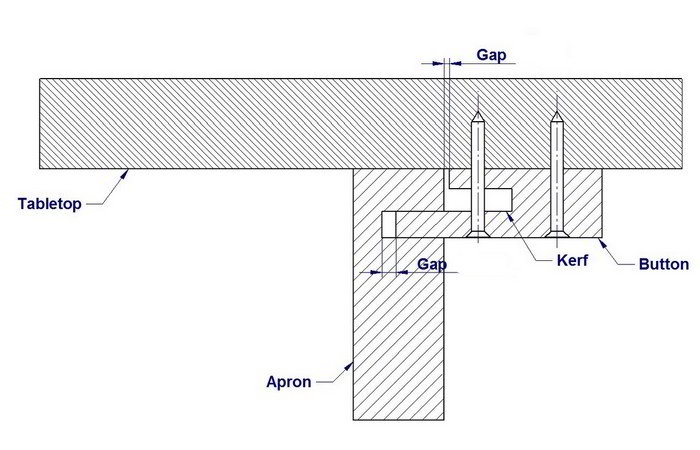
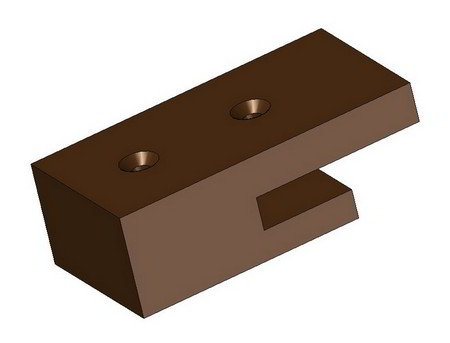
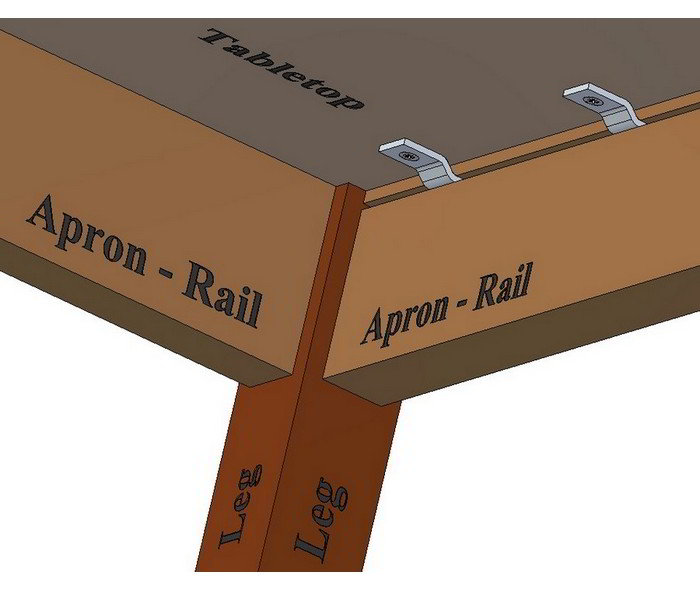
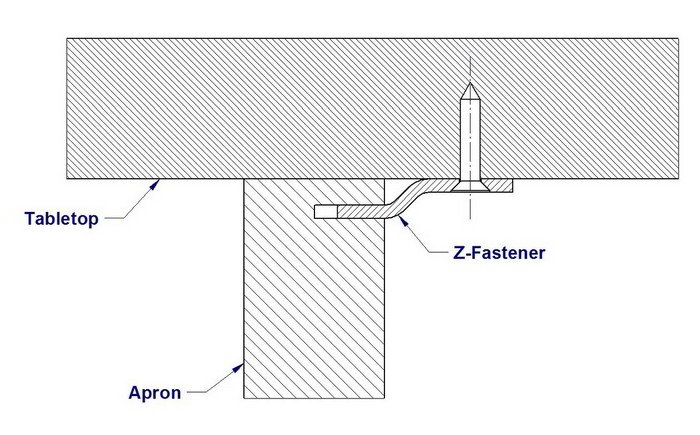
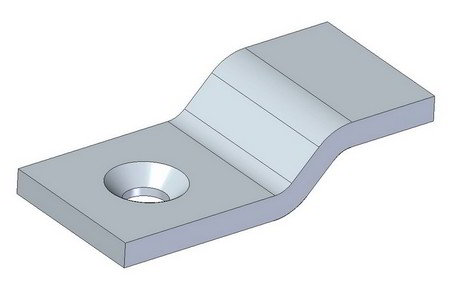
3. Metal table clips (Z fastener, S-shaped clips) – Z-fasteners are a metal version of the button fasteners. It is an inexpensive and easy to install, and allows for a great deal of wood movement.
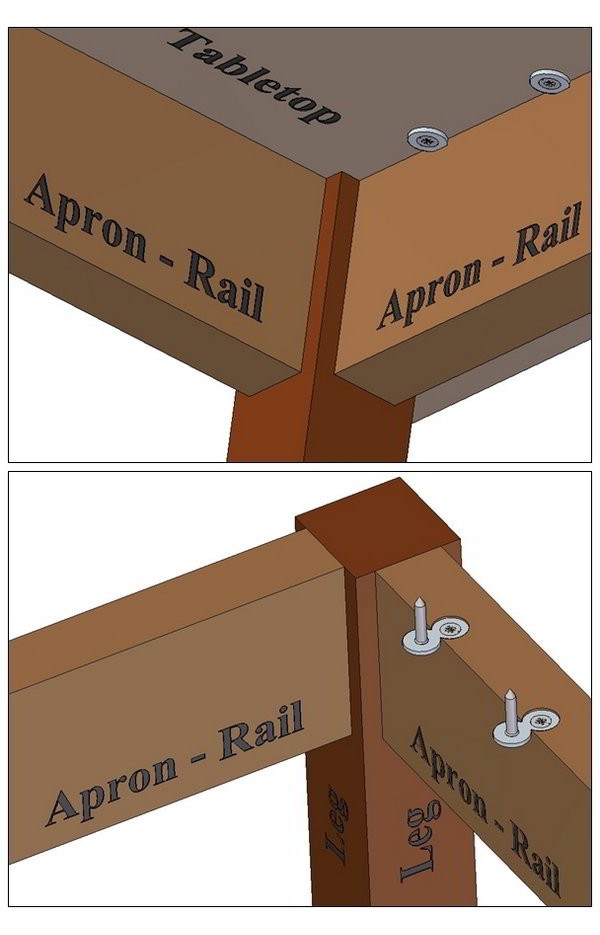
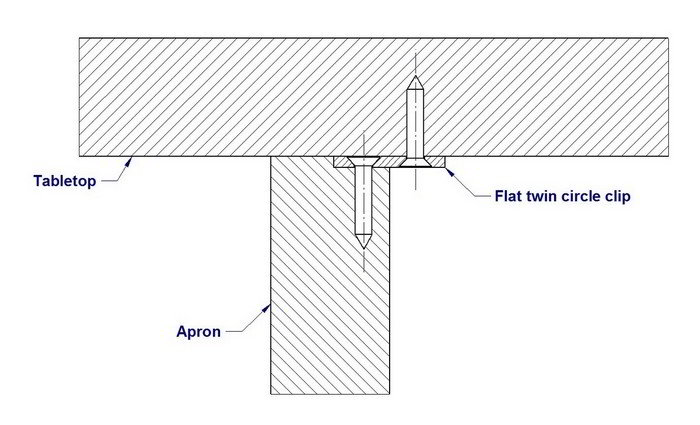
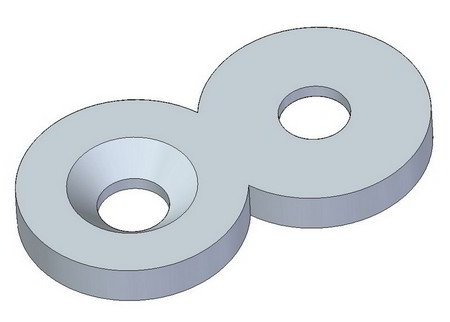
4. Flat twin circle clip (figure 8 clip, or figure 8 fastener) – Easy to install and inexpensive. The shape of the figure 8 fastener allows them to pivot as the tabletop expands and contracts. Depending on accessibility, these fasteners can be installed on the inside or outside of the apron.
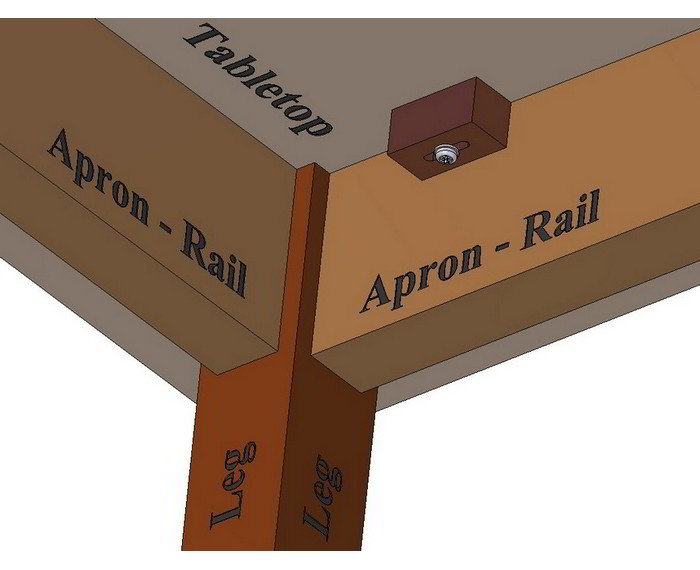
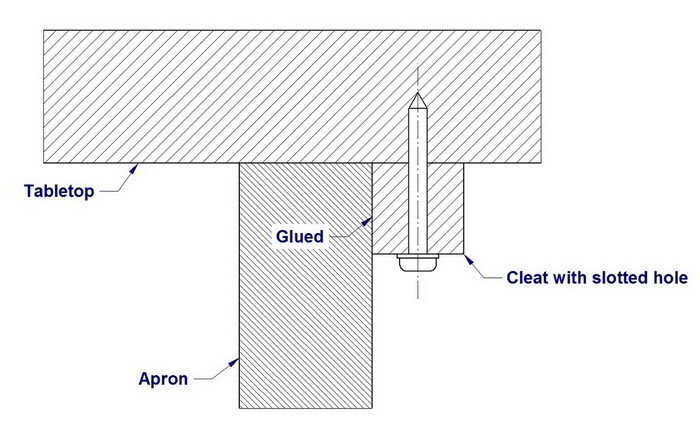
5. Cleat with slotted hole (wooden blocks) – Glued to the apron and screwed to the underside of the tabletop. Block must be designed so that the long grain (not the end grain) is glued to the apron. If the block were made without a groove, this way would fall into the stationary method.
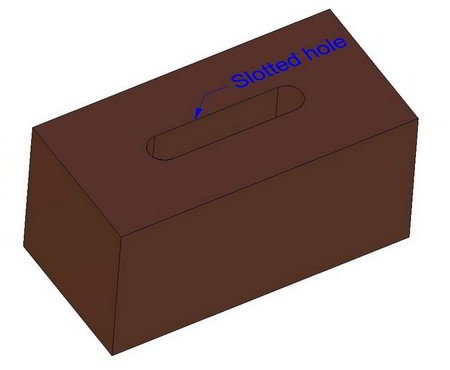
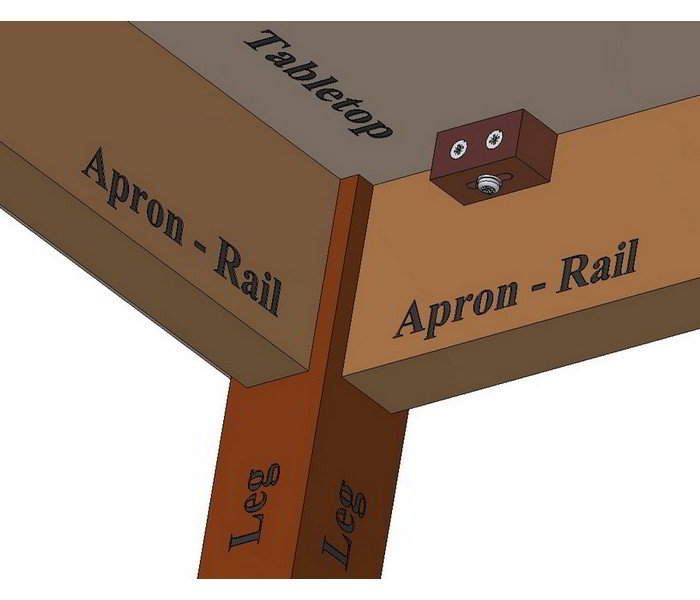
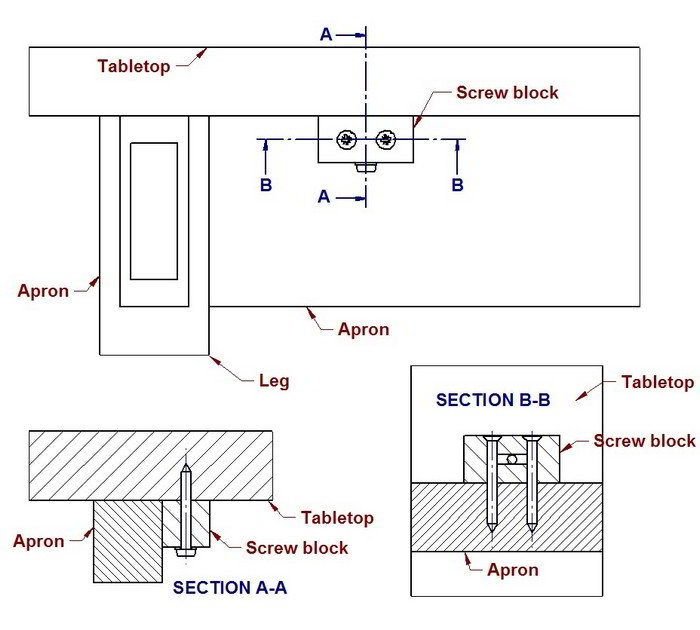
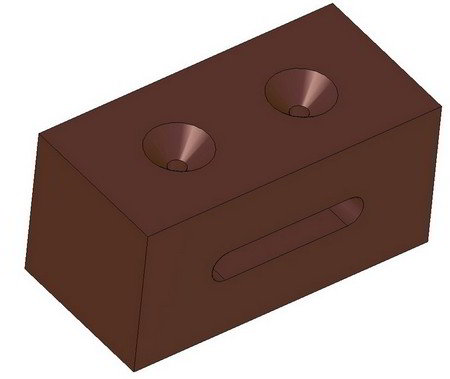
6. Screw block (cleat) – This method is similar to the previous one, the only difference is that the block is fixed to the apron with wood screws and not by gluing. If the block were made without a groove, this way would fall into the stationary method.
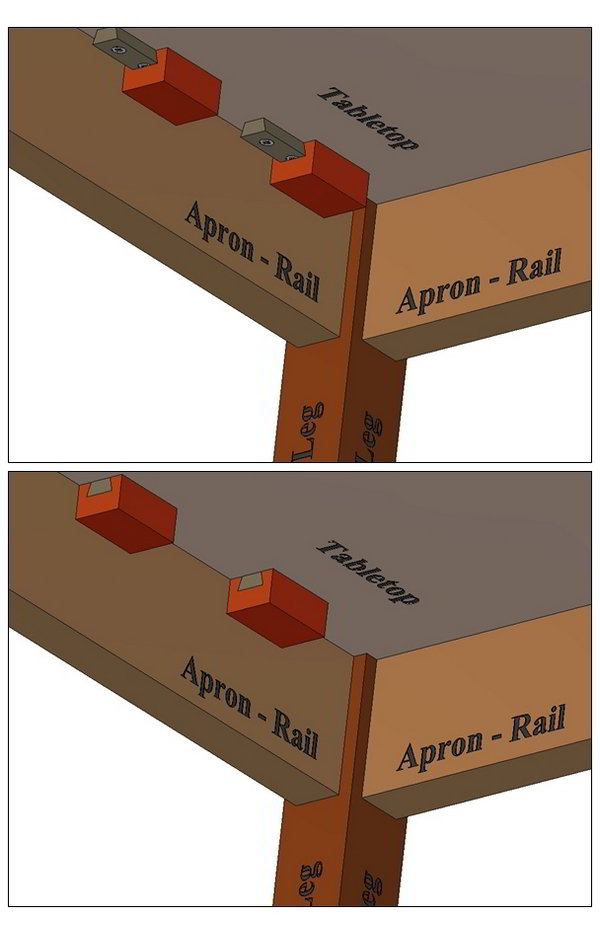
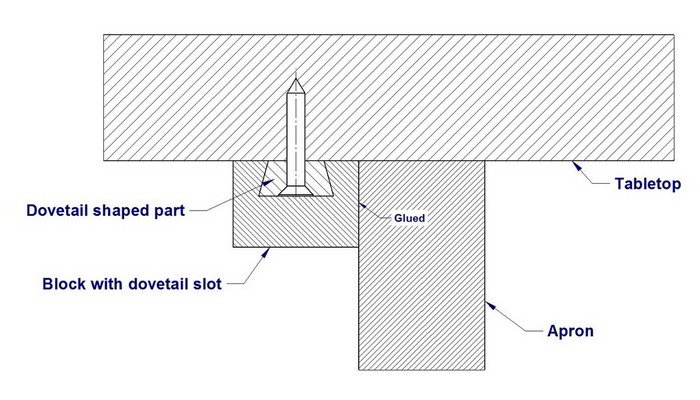
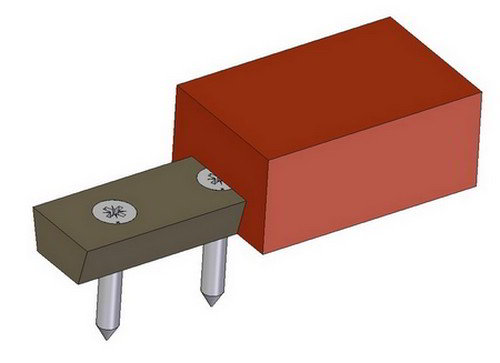
7. Dovetail block – allows the most movement but is the hardest to make. A dovetail shaped part is screwed to the tabletop, and a block with corresponding slot is glued to the apron.
8. Beveled cleat
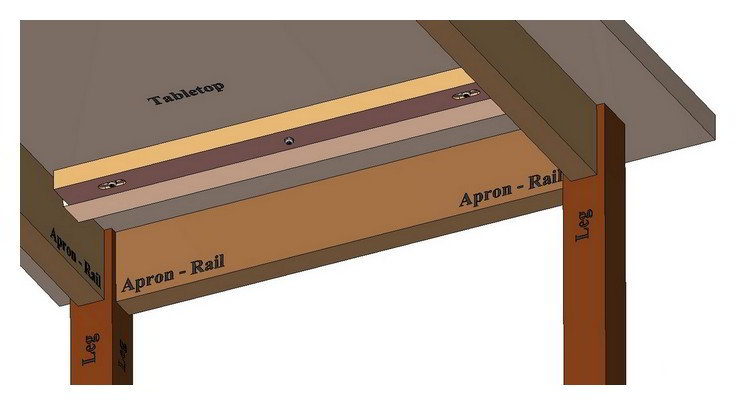
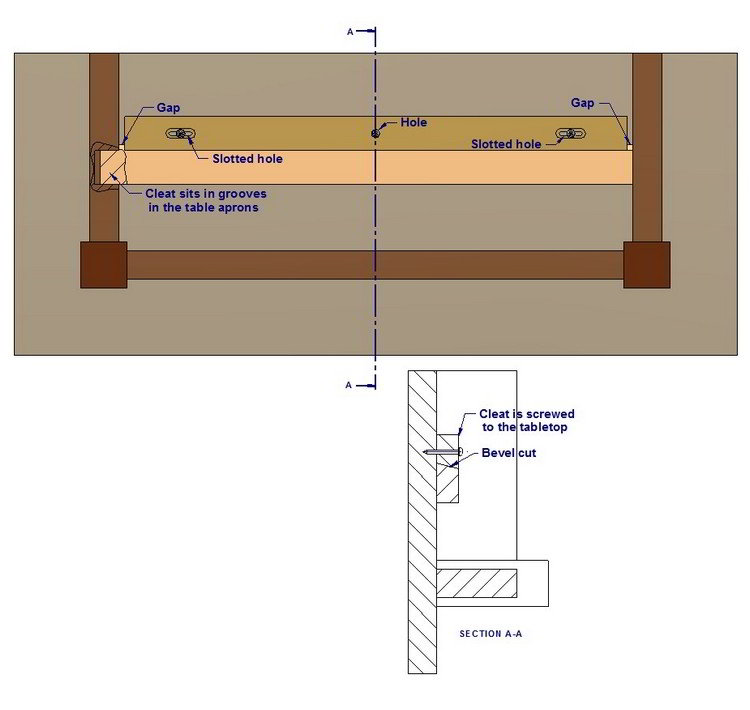
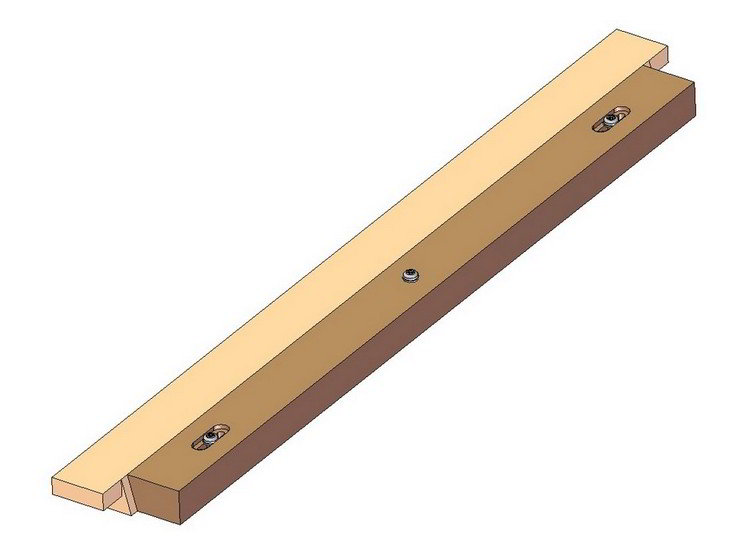
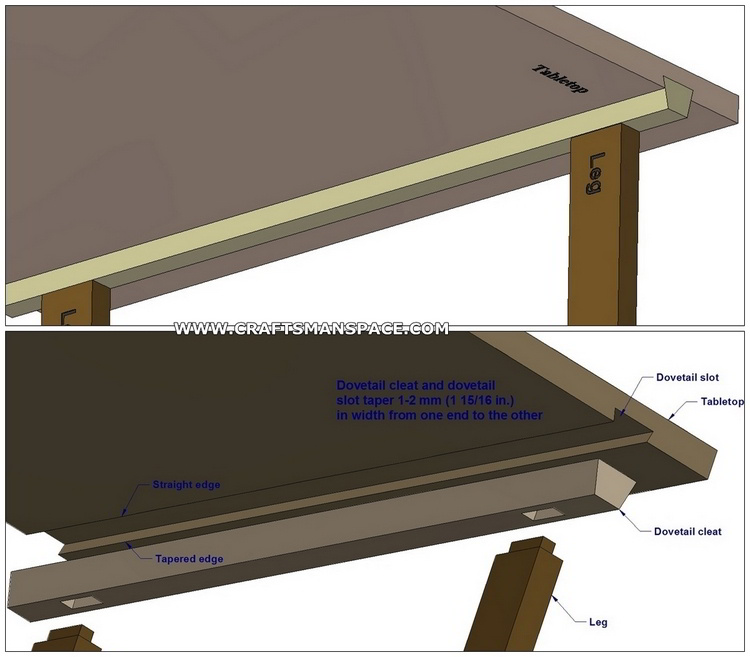
9. Dovetail cleat – Slot and dovetail cleat taper 1/16in. in width from one end to the other. The dovetailed cleats keep a tabletop flat, and they also allow movement.

- Stationary tabletop fastening method
10. Pocket hole – great for small tables. The holes are drilled at an angle of 10 degrees. Pocket holes can be made to allow for slight movement of the tabletop in two ways: by drilling slightly oversized pilot holes or by making the holes oval in the direction of movement.
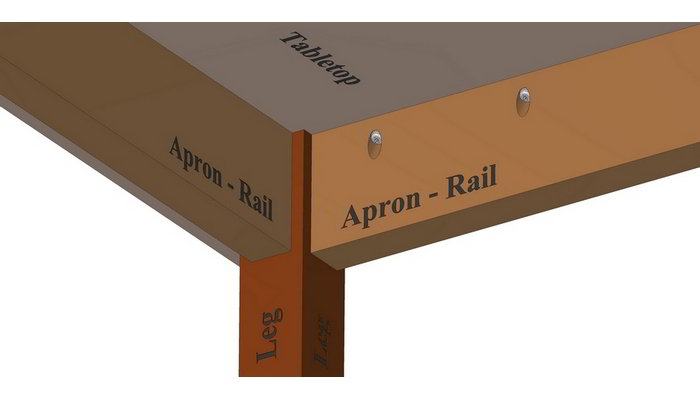

11. Corner iron
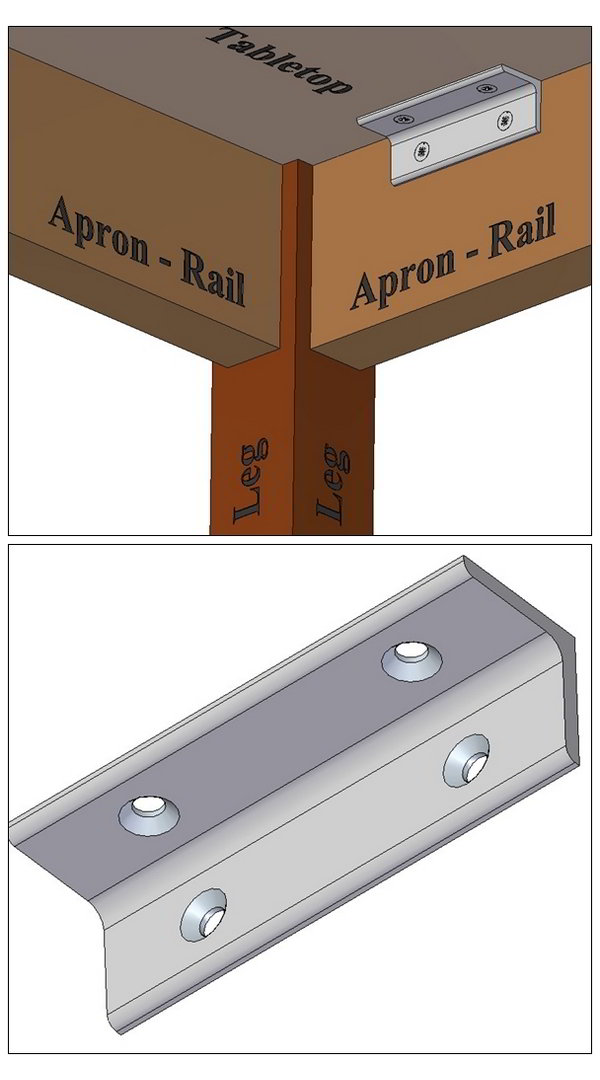
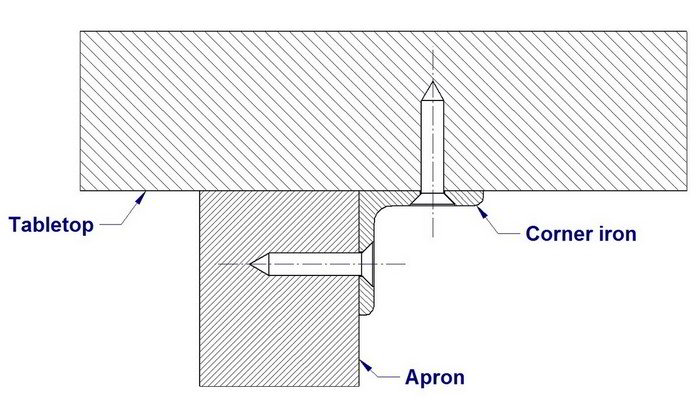
By making grooves instead of holes, this method would become a free-moving fastening method.
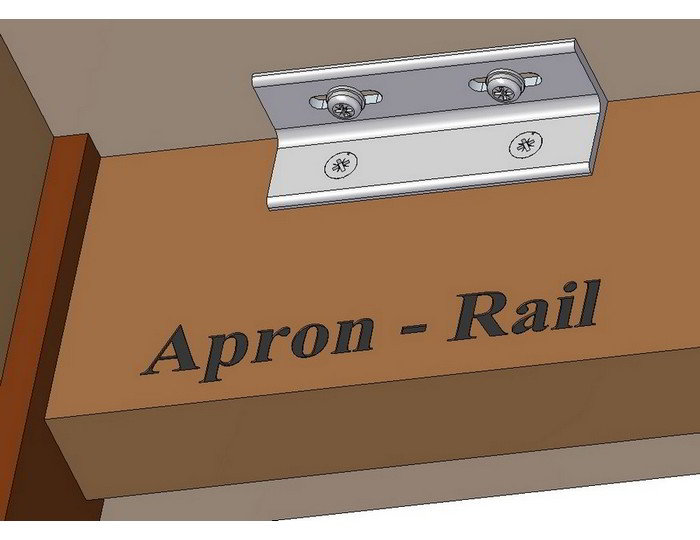
12. Dowel
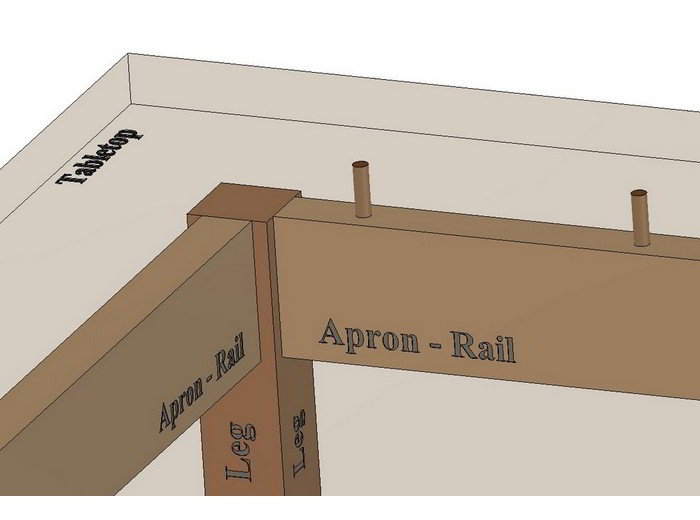
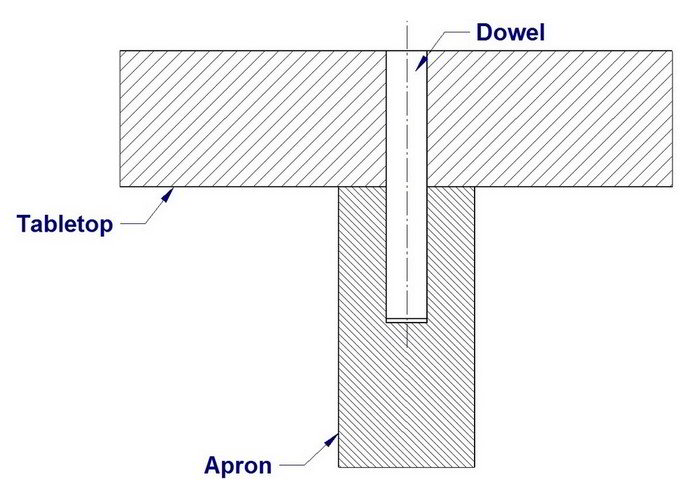
13. Screw – If shank hole and counterbore are oversized, this will allow the tabletop slight movement.
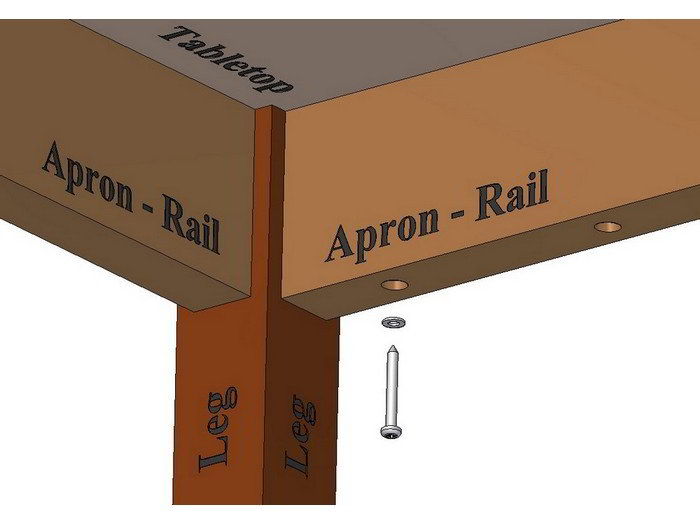
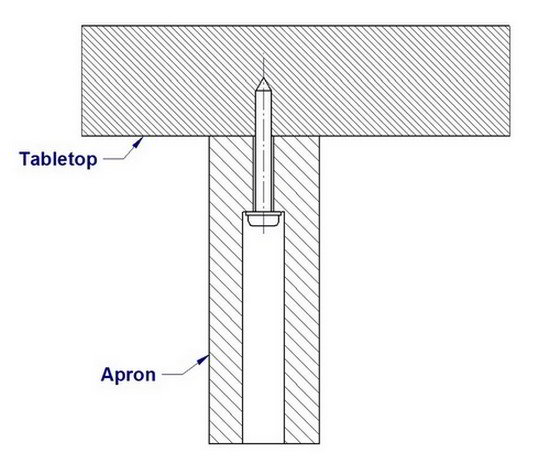
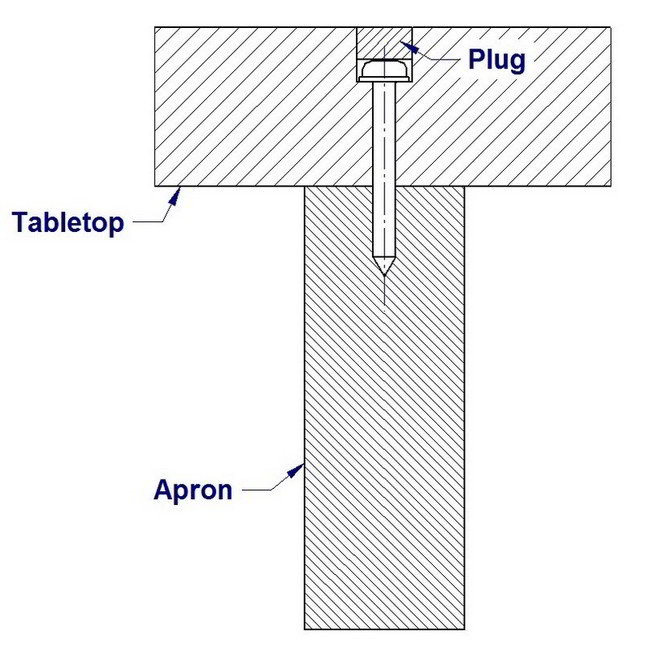
14. Screw and plugs
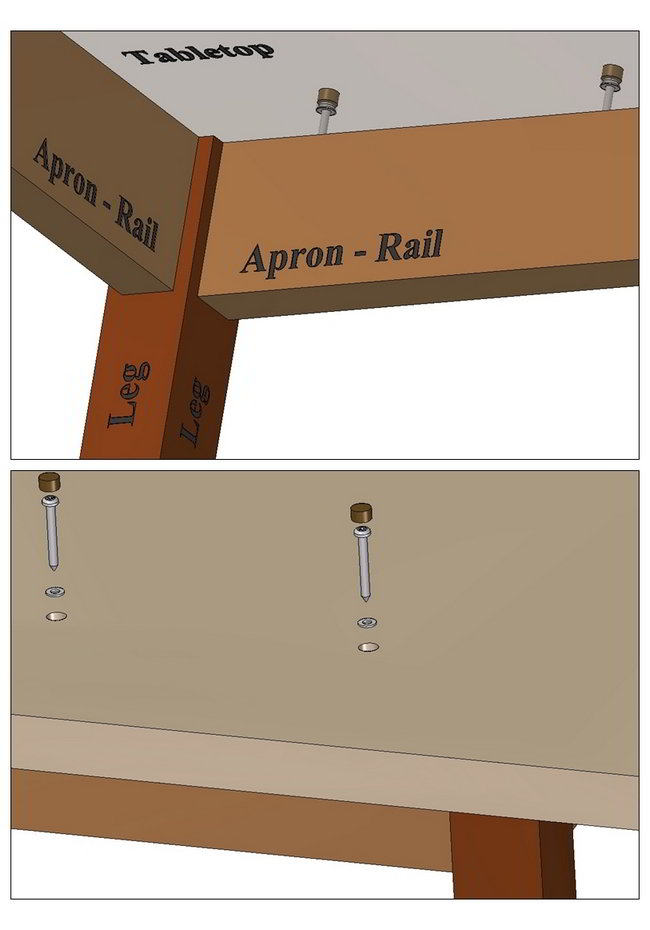
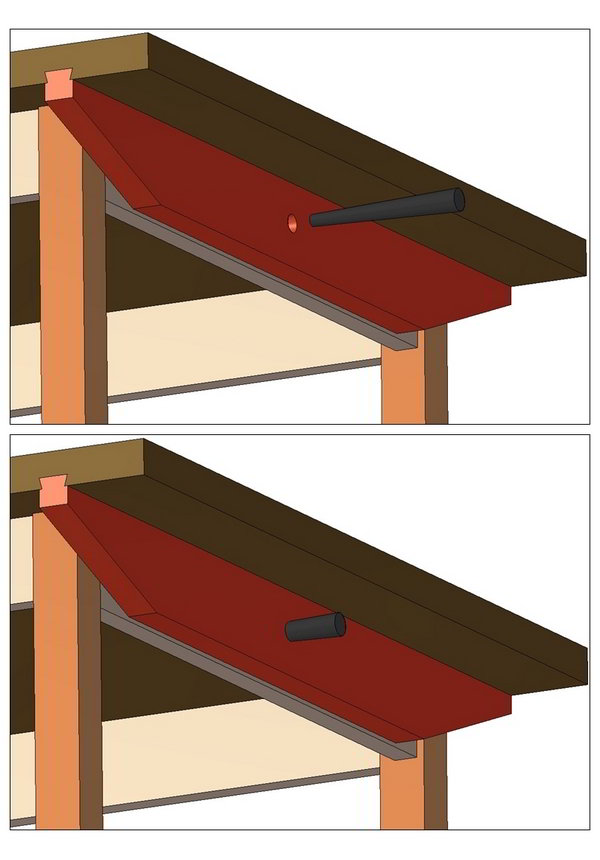
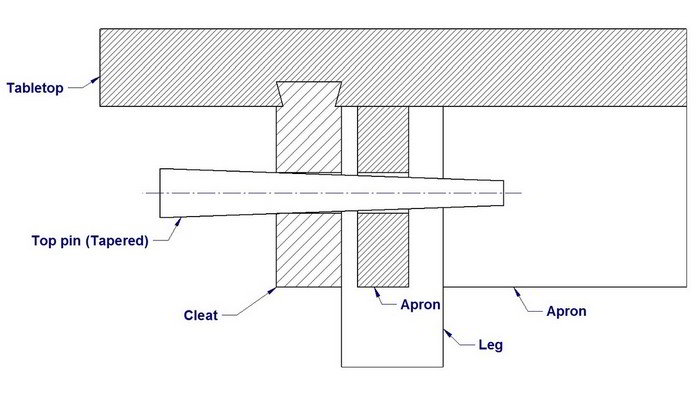
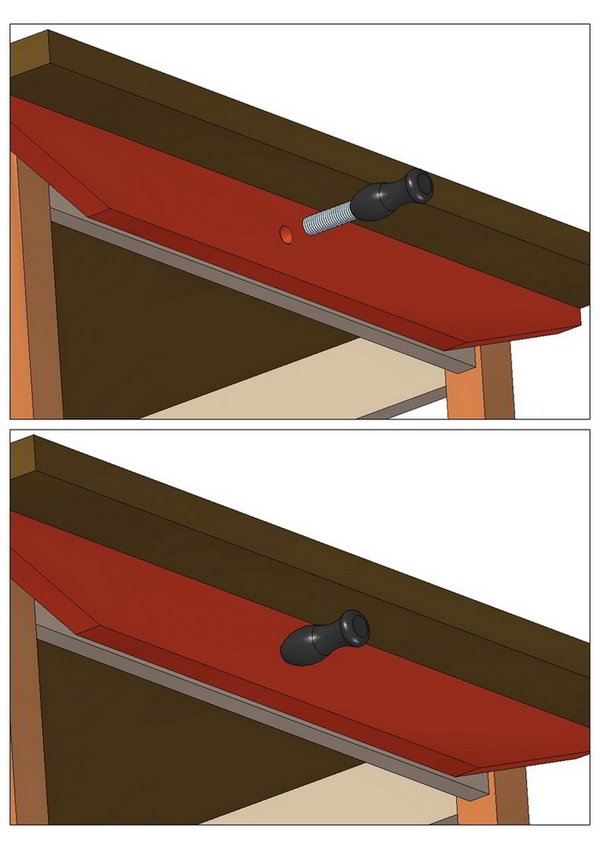
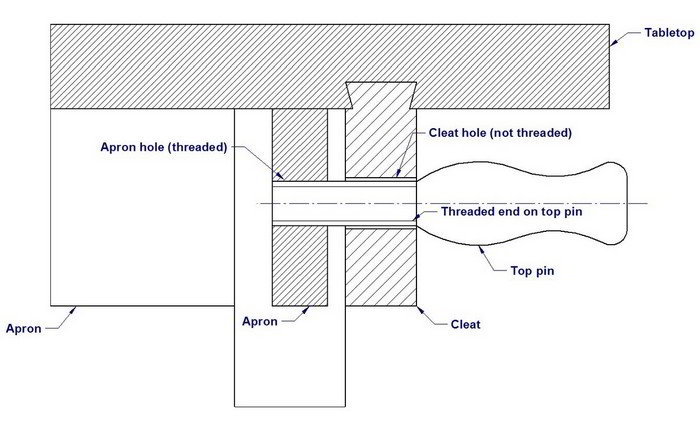
15. Top pin – Top pin can be tapered or threaded. This method is suitable for heavy and large tables that often need to be moved when expanded. In the past, it was mainly used for tables in pubs, butchers' tables and the like.
Tapered top pin
Threaded top pin
16. In the next picture you can see how to attach the tabletop to a tripod table structure.
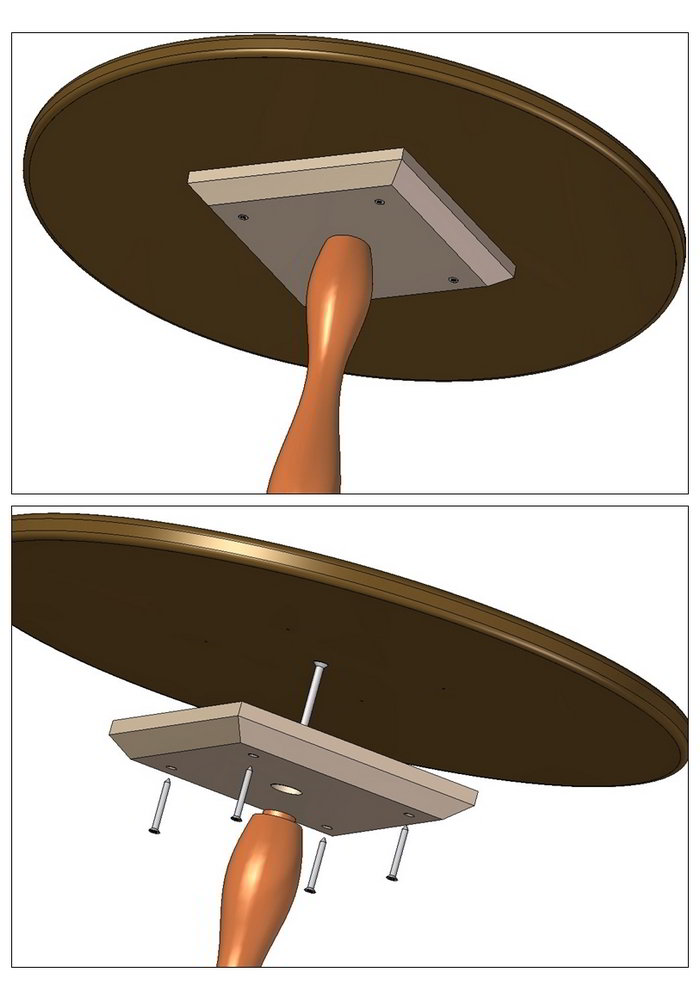
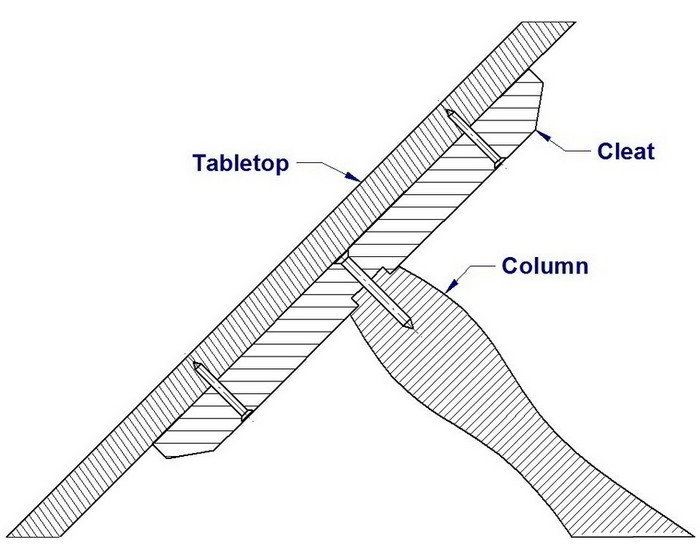
17. In the next picture you can see how to attach the tabletop to a table structure that has no apron.
