Here you can download a plan for making a traditional Potter's wheel, an appropriate tool for all hobbyists or professionals involved in pottery.
This plan is based on the potter's wheel plan found in an old issue of „Urob si sam“ (Do it yourself; No 64) magazine which was published in former Czechoslovakia.
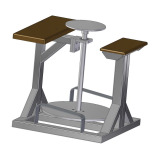
771mm (28'') x 824mm (32 7/16'') x 754mm (29 11/19)
The potter's wheel is an indispensable tool in any pottery workshop intended for making circular-shaped clay pots. Clay pottery has been made in this way since prehistoric times, and in the past it had an extremely important role in people's lives. Practically all containers/dishes, meant for any purpose, used to be made from clay. Even today clay pottery is frequently used for the preparation and storage of food and decorative purposes. The potter's wheel is a unique tool that has not undergone any major changes as regards the principle of operation since its inception (4,000-5,000 years ago). It consists of a structure whose role is to allow rotation of two discs connected by a vertical shaft. By kicking the lower disc, its rotation is started and further transmitted through the shaft to the upper disk. The potter throws the clay at the center of the upper disc to shape it with his/her hands into circular-shaped pots. A disadvantage lies in the fact that the potter's wheel requires parallel synchronized leg movement and precise handwork. The synchronization is achieved by exercise, which may represent a problem for people who want to see good results immediately. If you are interested in experimenting, you can install the electric motor with speed control. The engine should have a power of 0.7 to 1 KW.
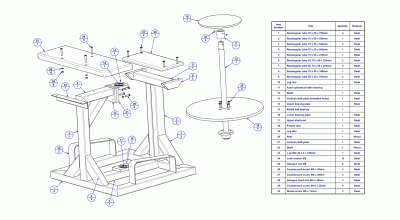
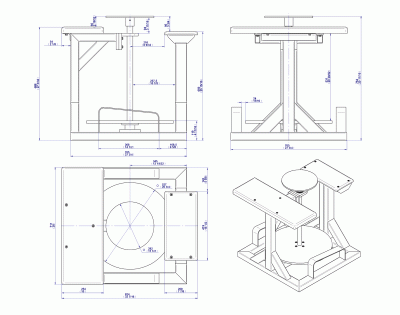
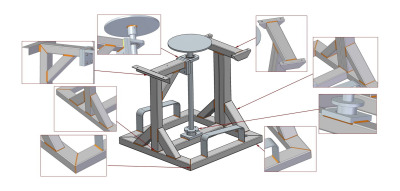
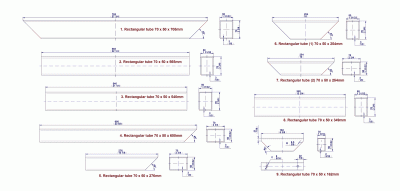
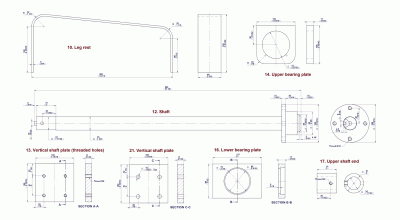
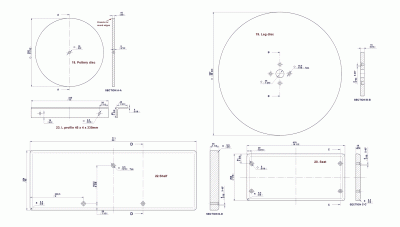
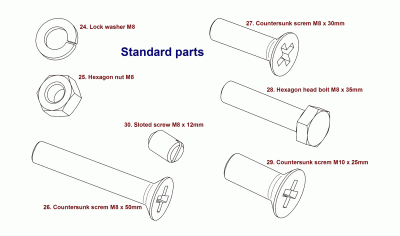
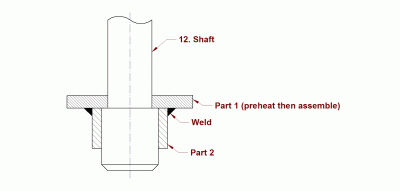
The complete structure is made of metal and composed of mutually welded tubes. Disk rotation and the vertical position of the shaft is made possible through the axial and radial bearings. The lower end of the shaft is proportionally larger in diameter than the remaining part, which may increase the production price because a lot of material is wasted when this part is manufactured on a lathe. In order to be economical, you can either:
- Find a similar shaft, however, the problem here is that you will need to either adjust the potter's wheel structure to the new shaft dimensions or process your existing shaft to match the dimensions given in the plan;
- Make the shaft end from several parts as shown in the following picture:
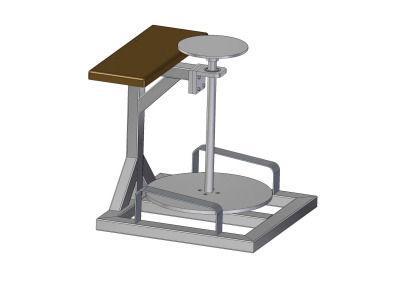
Based on the image on the original magazine's front page where a young boy was shown working at the potter's wheel (the one from our plan), as well as on the measurements taken in 3D CAD program, we have come to the conclusion that this pottery tool is intended for people who are up to 170 cm tall and have a maximum body weight of 70 kg.
If you do not fit in the above dimensions, we recommend that you adjust the potter's wheel to your own size. Keep in mind that ergonomics is a very important part of the design, as you will spend many hours working at your wheel. This can be done by increasing the height of the upper disk, reducing the height of the seat or by moving the seat farther from the disc. If you decide to reduce the seat height, do not forget that it must be adjusted to achieve a good sitting position and comfortable kicking of the lower disc (19. Leg disc). The edges of the upper disc (18. Pottery disc) need to be rounded off, so as to avoid any injuries due to the fact that it rotates very near to your thigh.
If you do not want to experiment with adjusting the dimensions, and the given ones do not accommodate you, a simple solution is to exclude the construction of the seat (image above).
In this case, there are two possibilities :
- to find a suitable chair and work in a sitting position or
- to raise the height of the upper disk slightly and work in a standing position.