In this woodworking project we present a embroidery box which is not only very pleasing in design, but is extremely functional.
Art of hand-made embroidery is one of the most beautiful craft and its origins are reaching long back in the history – around 5th Century BC. Its puropse is to decorate various fabrics with thread, floss and yarn. People simply love to use their imagination and decorate their blouses, table clothes , bedsheets etc. and almost each nation has its own distinctive style of embroidery. Now, each embroidery designs is made by rich collored motives and for that everyone needs a lots of spools of threads. This wooden decorative embroidery box is just ideal to keep that embroidery threads in it, scissors, embroidery needles and other things, to have a nice embroidery kit always arranged when inspired for sewing.

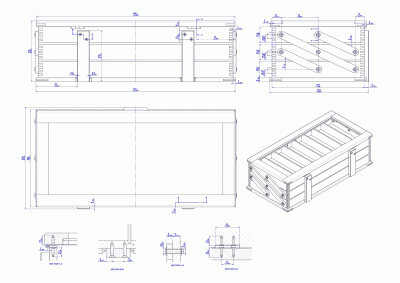
Length 410mm (16.14'') x Width 209mm (8.23'') x Height 125mm (4.92'')
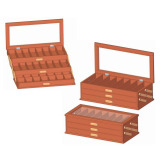
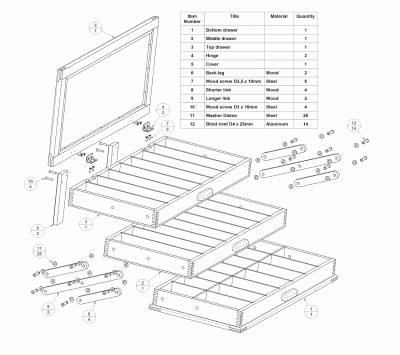
The box consists of 3 trays that are opened together by a mechanism. In each tray there are partitions to divide it into several compartments. The illustration shows the appearance of an open and closed box. This whole plan is based on a box over 50 years old.The box was owned by a professional tailor and it served him for a very long time. In this woodworking plan, the partitions were made to resemble the original embroidery box that we found quite inspiring, but they can easily be altered and adapted to your needs. The top tray has a lid made of glass, giving the box a decorative note and enabling you to see its content. Since the original box is still in use, speaking out of our own experience, we recommend that the things you use most often are kept in the top tray.


Each tray consists of sides that are joined by box joints and has a bottom that is glued and additionally tied with small nails for box sides. All three trays are connected by a mechanism that opens an attractive embroidery box (see picture above) and allows you to have access to all the trays at the same time.
If you want to change the dimensions of the whole box, special attention should be paid to the opening mechanism to keep it functioning smoothly, as well as the supports that prevent the box from tilting back when it opens. Although this box seems to be a complex one, it is actually not hard to make. It requires a lot of precision and experience, though. Its construction consists of very simple parts that are connected by box joints whose design is known to every box maker. If you have even the slightest idea about woodworking, and your wife or daughter happen to like sewing, we recommend this beautiful embroidery box as a unique DIY gift idea for both or either of them!
To make the box more beautiful, you can decorate its sides with some of the wood decoration techniques: carving, painting, marquetry...