Here you are offered a free laser cutting project according to which you can make a collapsible storage box.
Over the course of life, you slowly start accumulating various things that you don’t use so much any more, but you know you would regret throwing them away or selling them if possible. The whole situation, therefore, demands of you to allocate some of your precious space for storing all these things. One solution to the problem may be with the help of collapsible storage boxes, the DIY building plan of which is being offered here.
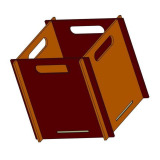
This free woodworking plan by which you can make collapsible storage box has been created with the free parametric 3D CAD software FreeCAD.
344mm (1' 1+17/32'') x 344mm (1' 1+17/32'') x 344mm (1' 1+17/32'')
These are simple boxes that have many good features:
- they are foldable so they take up little space when you don't need them;
- they can be made in different dimensions;
- various things can be stored in them, from textiles to hard and heavy items;
- they can be stacked vertically or horizontally;
- almost no carpentry knowledge/experience is needed to make them;
- you can paint and portray them in countless ways and thus obtain very nice pieces of home furniture;
- they are easy to move &
- they can be used not only at home but also in workshops, stores and similar places.
The boxes are fully collapsible, which facilitates your efforts because you don't have to glue the parts together or use any fasteners. The parts are of simple geometry, rectangular in shape, with finger openings, kerfs and slots (and tabs) that serve to interconnect them.
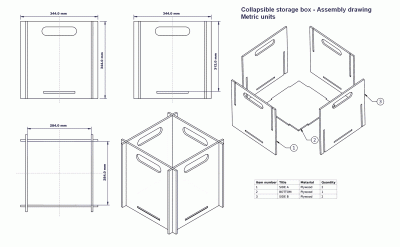
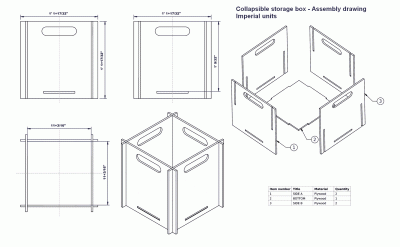
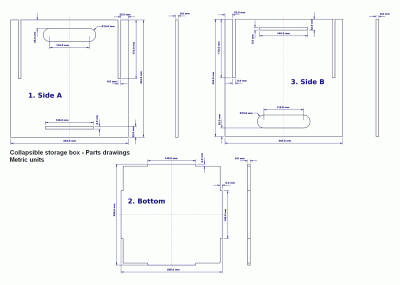
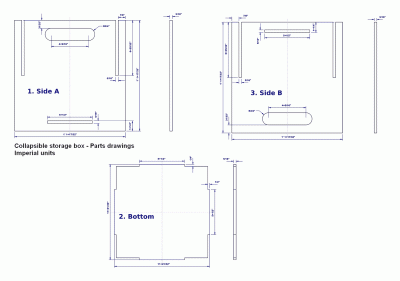
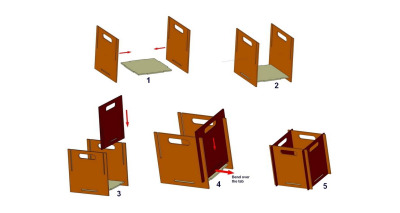
If you take a look at the parts layout, it will be clear that you only need to get the right material to cut according to our drawings and then assemble your boxes. We recommend plywood 6-10mm (¼ - 3/8 in) thick, and the parts can be cut by hand or using various machines and power tools. The forming of boxes is easy as long as you follow the folding order: First assemble the bottom and the two sides A, then slide each side B into place by bending them out, over the tabs, until tabs snap into place. All kerfs and slots must be slightly wider than material thickness. If you cut the slots and kerfs too tight, carefully sand them to make it easier to assemble the box.
Choose the parts finish to your liking, and paint/portray the boxes to add some extra fun during the work. Just imagine how your child(ren) would be amused with the finishing if you let them do it with you! This way, you will both spend some quality time with your child and get decorative boxes that will not only serve to store unnecessary items, but also accommodate a variety of other items in your home.