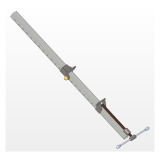
Bar clamps are an indispensable tool when you need to temporarily hold work securely in place. They are most commonly used when gluing wood or welding metal parts.
Metal bar clamps are designed to withstand the pressure of holding large and heavy workpieces, i. e., to be capable of heavy-duty clamping. Although metal bar clamps can be bought at almost every tool store today, quality bar clamps can be quite expensive, and there is always the need for a few of them in your workshop. For this reason, we present here a plan for making a metal bar clamp whose construction has been tested in practice.

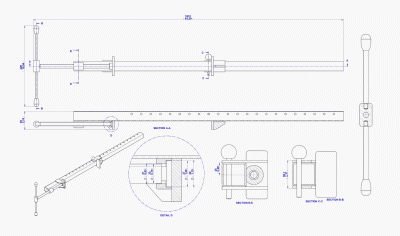
L 1610mm (63.39'') x 420mm (16.54'') x 95mm (3.74'')
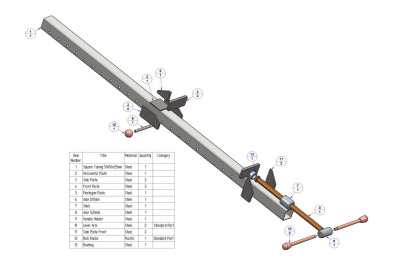
Like any bar clamp, this one in our plan consists of a metal bar Part 1 – Square tubing 50x50x2,5mm), back jaw, head jaw, screw and handle. Back jaw i head jaw rest on the bar, facing each other. The head jaw is located on the front of the clamp and its position is controlled via a screw by turning the handle. The back jaw is located at the back of the clamp and can be locked when it is in the desired position. In industry made metal bar clamps, the back and head jaw are usually made by casting or pressing as separate parts. Since it is not possible to do this in an amateur workshop, in our plan these parts are made by welding several simple parts
.


In the plan you can find drawings of each part with all the necessary dimensions, drawings of the bar clamp assembly with the position of each part and parts list. You can freely customize the dimensions and construction from this plan to your specific needs.
How to use a metal bar clamp
- Place one or more bar clamps on the desktop.
- Open the jaws of the clamp as wide as necessary by turning the handle.
- To avoid the risk of the jaws leaving marks on the wood after using the bar clamp, protect your workpiece before clamping.
- Insert the workpiece into the open jaws of the clamp.
- Lock back jaw as close as possible to the workpiece. Secure back jaw with pin (Part 6 – Axle 10mm)
- Rotate the handle to the right until the head jaw closes in on the workpiece. Keep rotating handle until the workpiece is firmly secured. Be careful not to over-tighten the screw, as this may damage your wood.
The making of this metal bar clamp is not difficult, all the parts are simple and all you need is at least a little bit of practice in welding. Apart from the welding machine, all the tools you need can be found in every amateur workshop.
The screw can be made from a standard threaded rod, or you can buy a rod with trapezoidal thread form and customize the bar clamp structure to its dimensions.
If you want to make a wooden bar clamp, there is a special plan for it on our site.