On this page you can download plans that can help you make three simple toys on wheels, an eco-friendly and natural toys which will be loved by your little ones.
Toys on wheels are among the first types of toys that children start actively to play with. In their early age children love to push toys on wheels with their hands, or to pull them if they have tied rope. Besides developing motor and sensory functions, these toys have also an educational function, because children can learn about the objects and animals that these toys represent.
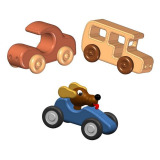
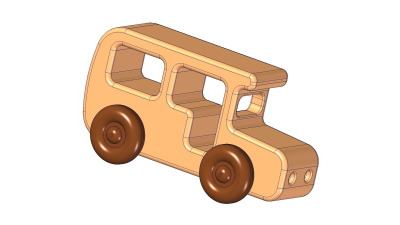
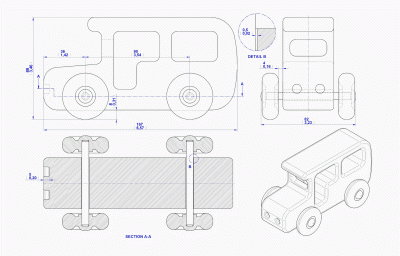
Bus kids toy: L 167mm (6.57'') x W 82mm (3.23'') x H 88mm (3.46'')
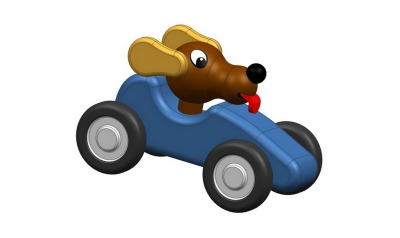
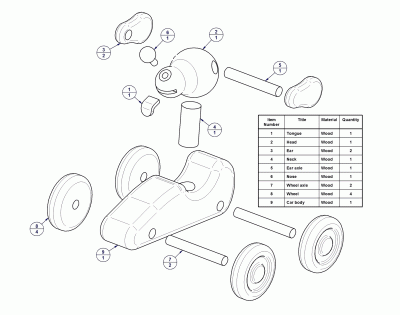
Dog in car toy: L 132mm (5.2'') x W 63.5mm (2.5'') x H 84mm (3.3'')
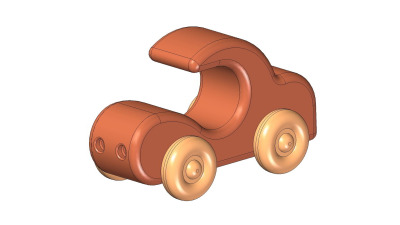
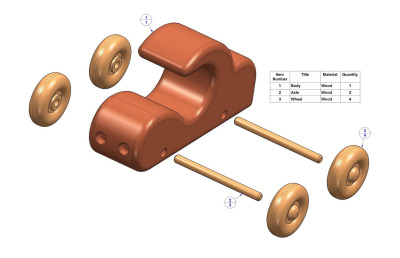
Old car kids toy: L 152.5mm (6'') x W 82mm (3.23'') x H 90mm (3.54'')
Making toys on wheels is quite simple. Toy can be shaped like some animal, car, truck, etc. The desired body shape of these toys can be found in books or pictures, and you just need to adjust dimension and cut out the wanted pattern. Never forget that the main points in successful toy making are simple lines, solid construction, and clear, bright colors. These toys can also be well manufactured by the older children in school, under the supervision of the teacher. The only equipment necessary for making many toys on wheels are a coping saw, a jackknife, a scissors, a hammer and a rule. While other hand tools are sometimes needed and are always useful, they are not essential.
Stock for the toys body depends on the toy size, the form of construction, and, to a lesser degree, upon the kind of wood. Stock for the toys body can have any thickness, but our recommendation is at least 19mm (3/4''). It is best for the stock to be from 38 to 76mm (1.5 to 3'') thick. If a toy is to be cut from plain board, the grain of the wood must be considered and made to run in the direction best serving to strengthen the weaker parts.
For manufacturing these toys you can use scrap wood from the workshop; and the material can be many types of wood (maple, alder, birch, sycamore, poplar, cherry and similar) or laminated plywood.
Instructions:
- Pattern for the toys body can be taken from any photo that you like, and if the pattern needs to be enlarged, you can use the copy machine or computer for this purpose. Then transfer your design on stock. A design may be traced by placing a piece of transparent paper over the desired photography and outlining it with a pencil. The resulting tracing is cut out, placed on a stiff piece of cardboard or fiber board, and redrawn on this. The board is then cut carefully with scissors or a sharp knife. Another simple method is to place a piece of carbon paper beneath the desired photography, carbon side down, and to go over the lines of the photography with a medium hard pencil. This transfer may be made directly on the wood or on a piece of cardboard which is to be cut out and used as a pattern.
- Sand all edges
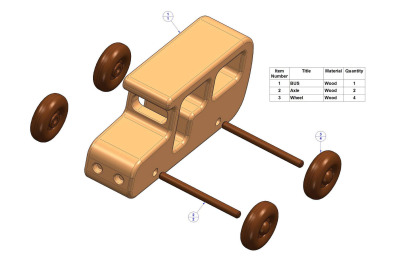
- Drill axle holes. Diameter of the axle holes depends on the type of wheels you have selected.
- If you’ve selected the wheels with different diameters than those in our plan, you have to adjust distance between the wheels, and also the distance between the wheels and the body edge of the toy.
- Mount the wheels and axles
- The wheels can be attached using a screw on which the wheel may turn freely. Put a flat washer between the wheel and toy body
- The wheels can be mounted on the ends of a dowl which runs through the body of the toy. Put a flat washer between the wheel and toy body
- Finish as desired
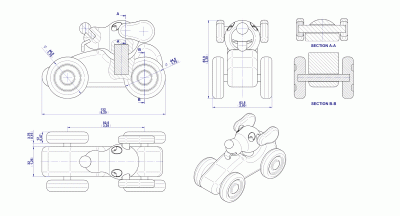
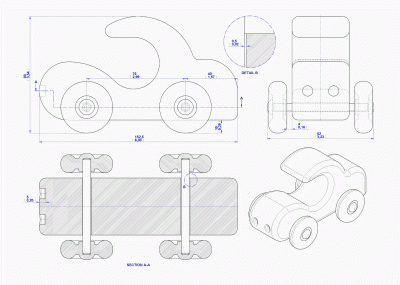
Cutting the toy wheels:
- Cutting wheels - A circle of the desired size wheel may be laid out on the wood with compass, and cut in the outline with a coping saw or band saw. This method of cutting the toy wheels is quite slow and it is not adequate for making a large number of wheels. Besides that, the quality of these wheels is poorer than the wheels made by the machine.
- Turning wheels. Turn a cylinder to the required diameter, on the turning lathe. Then cut the cylinder on the circular saw into required thicknesses of wheels desired. This method is recommended for quick work.
- Use of wheel cutter – Another method of making small wheels is by use of the circle cutter.
- There are many manufacturers of the toy wheels and you can buy it via internet or in the store.
If you want to decorate the sides of the wheels, put the made cylinders on the lathe and carefully work the sides of the wheels. In finding the center and drilling the center holes in all of the wheels, care must be observed. A jig with a fixed center can be devised to aid in drilling these center holes.
During the manufacture of these kinds of toys that contain several small parts (for example the wheels), make an effort to properly glue all the parts together, because if these small parts fall off somehow, it will be a potential choking hazard to a young child. Also, make sure that the glue is non toxic.
Thoroughly sand all the parts with several sandpapers with different grits. Sanding has to be perfect, so the child could not get injured by splinters. If you wish, you can coat the toy with some kind of the kids-safe finish like beeswax, mineral oil or shellac. If you want to paint the toy, use only the kids-safe colors. However - the safest final finish is no finish at all.