In front of you is a plan for the making of the Pyramid puzzle, very interesting puzzle but quite difficult to make.
Please find a suitable DIY plan offered on this page, which is based on a real wooden puzzle we bought at the store. The characteristic of this puzzle is that it is quite difficult to solve, but also quite difficult to make. It is pyramid-shaped and consists of 10 identical parts called segments. Two segments need to be glued together to form 5 sub-assemblies. In order to solve the puzzle, these 5 sub-assemblies need to be arranged in such a way to form a pyramid as shown in the picture.
To be honest, it was a little tricky to make a plan for this puzzle because the segment, though simple in shape, is difficult to visualize in both 2D and 3D space. Solving this puzzle is quite difficult but interesting. And when it comes to the making of the puzzle, it is a challenge indeed! (Remember: 10 segments in total, from which 5 sub-assemblies are made using two segments for each).
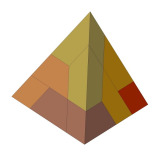
128mm (5 1/32'') x 111mm (4 3/8) x H 104mm (4 3/32)
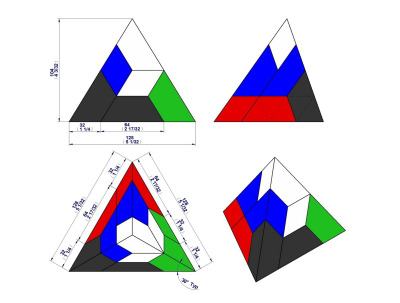
To help you figure out how to make the segments as easily as possible, we have included a few drawings and provided brief instructions that you can use to get the whole job done or that can serve you as a starting point to find your own method. In the picture showing the assembly drawing you can see characteristic views of the pyramid puzzle, with each sub-assembly colored differently. In the pictures showing the segment drawing you can see what a segment looks like. The first picture shows characteristic views of the puzzle, with one segment being shown with a black continuous line and the other segments with dashed lines. The second picture shows a technical drawing of the segment with all the necessary dimensions. From these pictures, it is clear that you need to cut a compound angle to make the segments.
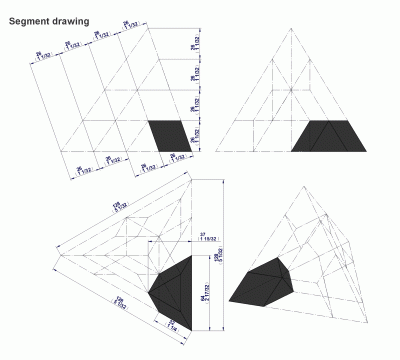
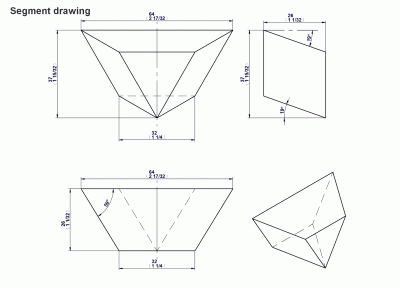
Segments cutting process
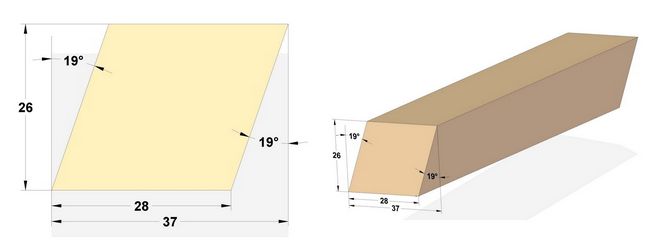
1. Cut the wooden lathe with cross section 37 x 26mm under the bevel angle of 19°, as it is shown on the pictures below.
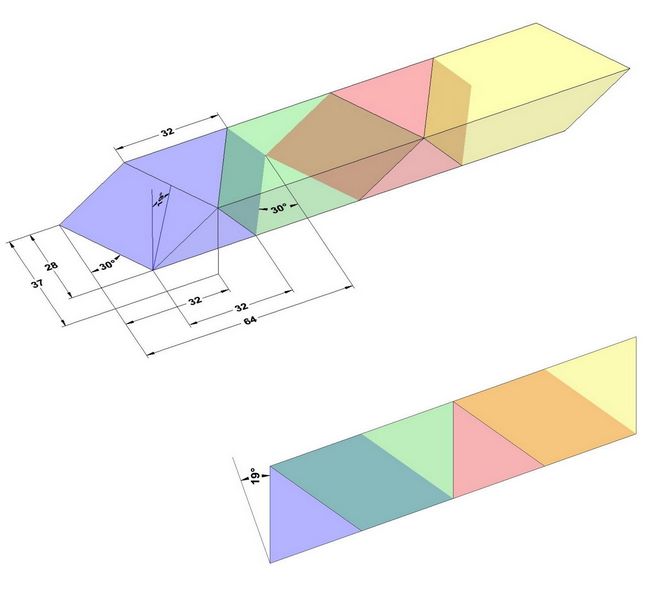
2. If you look the next picture, you can see that each segment is colored differently so you can see that these segments, lined up one after another, actually form the lathe made in the first step. To make these segments, you need to cut the lathes under the compound angle (30 degrees + 19degrees ) just like on pictures below.
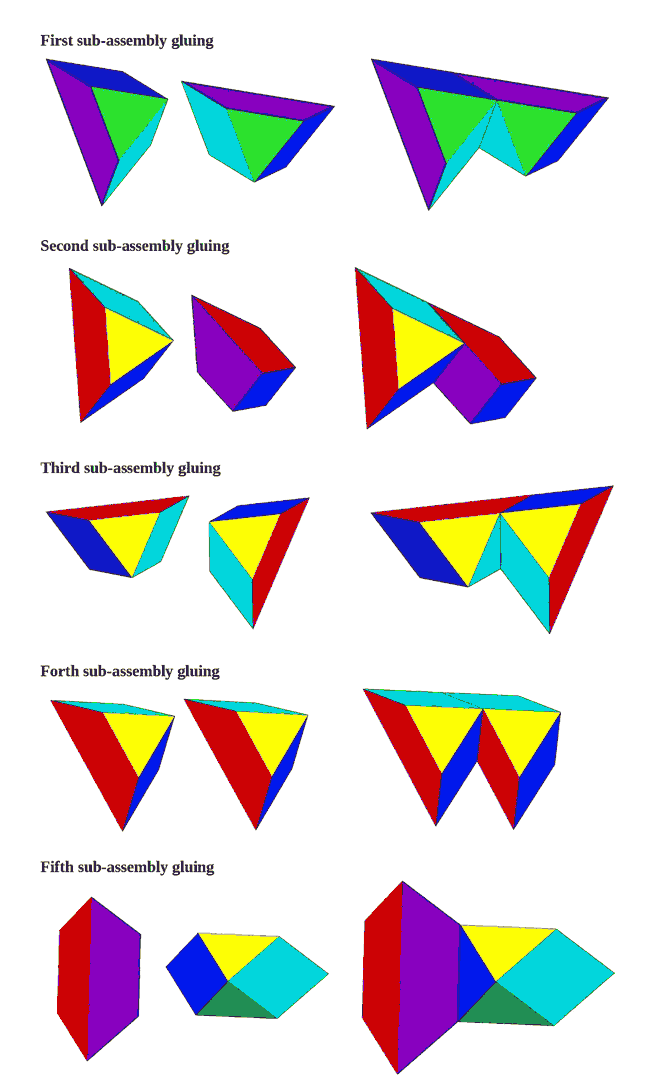
After you cut all of these segments, they need to be glued together in sub-assemblies, out of witch the pyramid is made. To better understand how segments should be glued together, each segment surface has been painted a different color, which makes it easier to show how to form sub-assemblies. Be very careful when gluing, as the segments looks very similar when viewed from different directions, and it is very difficult to determine which two surfaces are to be glued together.
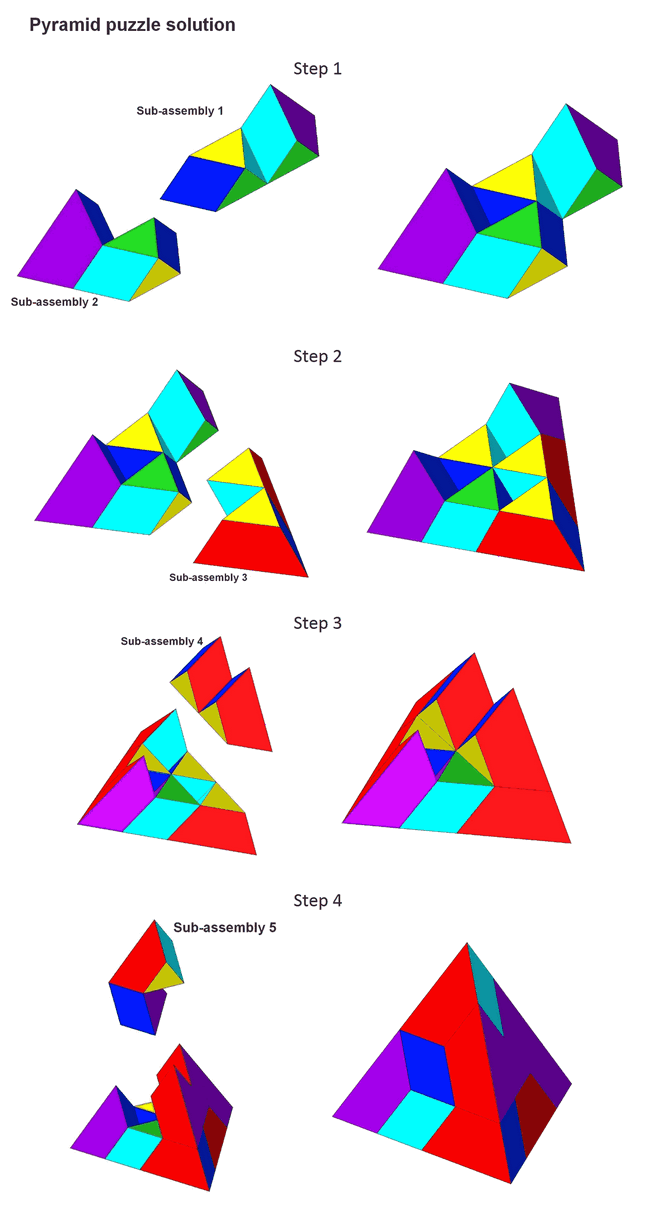
We have also provided you with a picture where you can see how to solve the pyramid puzzle.
We hope that these pictures and the instructions given will enable you to create this puzzle. Please note that the segments should be cut very carefully and precisely so as to be identical, as any inaccuracy will be visible on the assembled puzzle.
As you can see, the pyramid puzzle is an interesting challenge, and we can only hope that you will indulge in it!


