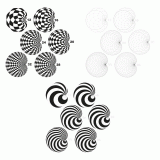
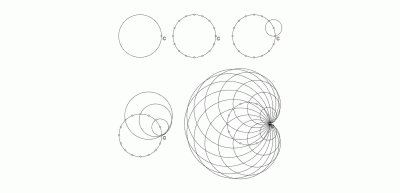
There are several ways you can draw a cardioid, and we have decided on the following way:
- Draw a circle of arbitrary diameter.
- Select an arbitrary point on the circle (the cusp of the cardioid will be in it); we have chosen the far right point and named it C.
- Draw a circle so that its center is at some point of the drawn circle and it passes through point C.
- If a sufficient number of such circles are drawn, it will be possible to accurately draw the envelope of these circles, which is in fact the cardioid.
What did we actually do to get these patterns?
- We took steps 1 and 2.
- At the beginning of step 3, we divided the circle into equal arcs. Depending on the pattern you are looking at, the circle was devided into 12, 16, 20, 24, 28 and 32 equal arcs.
- In step 4, we drew the circles. We did not draw the envelope, because we did not need a cardioid but only the pattern formed by drawing circles.
If you look at the picture of the patterns you have downloaded, you will see that there are two types of patterns offered:
- patterns that look like deformed checkerboards, obtained simply by coloring the fields created by crossing circles, but never coloring the adjacent fields and
- radial patterns, obtained by coloring the adjacent radial fields.
The patterns drawn by this procedure are very interesting, and in order for you to have a greater choice we have drawn 6 patterns of different densities, which is achieved by different division of the circle into arcs. We honestly have no idea what you could use these patterns for, but we believe that some of you will use them in the right way. We saw them once in a picture in a magazine and wondered how they were drawn. To save them from oblivion, we recorded the drawing procedure and offered these interesting patterns to you here. Hopefully, you’ll be satisfied!

