Here you can download drawings with which you can make 8 different versions of garden tools known as ‘dibber’, ‘dibble’ or ‘dibbler’.
The dibber is a simple garden tool, basically a pointed wooden stick that is used to quickly make holes in the ground when planting plants. It was used back in Ancient Rome, and even today it can be often found, especially with lovers of landscaping and gardening. There are several types of dibbers (straight dibber, T-handled dibber, L-shaped dibber, angled dibber, multi seed tray dibber...). We managed to find the most characteristic ones on the Internet and draw their 3D models, which you are offered to download here.
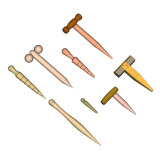
This project was drawn using the free 3D CAD software FreeCAD.
Garden dibber: Diameter 39mm (1 17/32''), Length 286mm (11 1/4'')
Planting dibber: L 330mm (13''), W 136 (5 3/8''), D 51mm (2'')
DIY mini dibber: Diameter 25mm (31/32''), Length 127mm (5'')
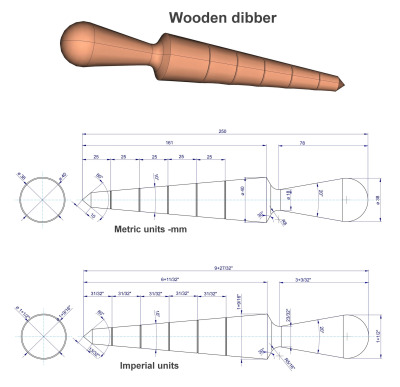
Wooden dibber: Diameter 40mm (1 9/16''), Length 250mm (9 27/32'')
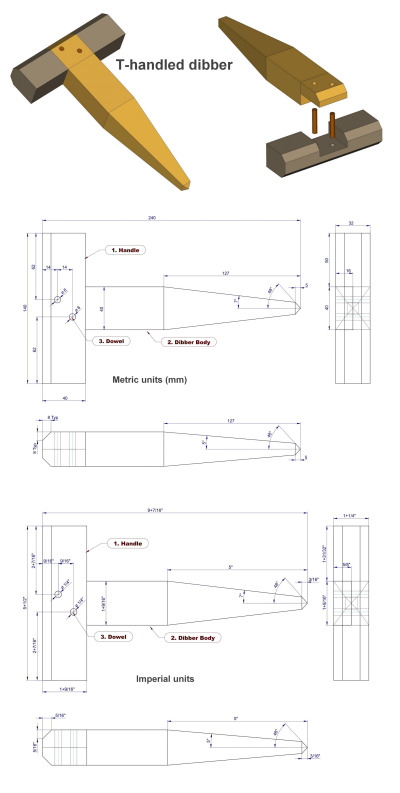
T-handled dibber: L 240mm (9 7/16''), W 140 (5 1/2''), D 32mm (1 1/4'')
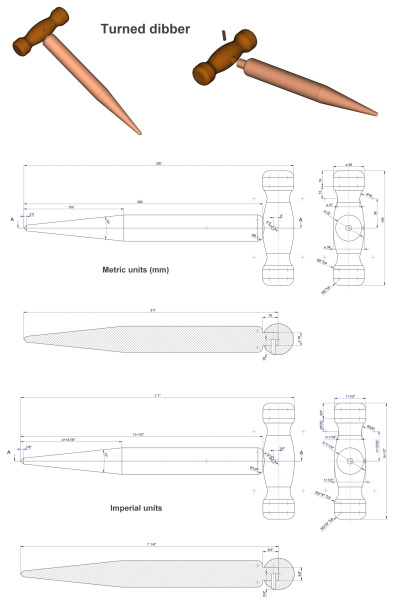
Turned dibber: L 330mm (13''), W 140 (5 1/2''), D 38mm (1 1/2'')
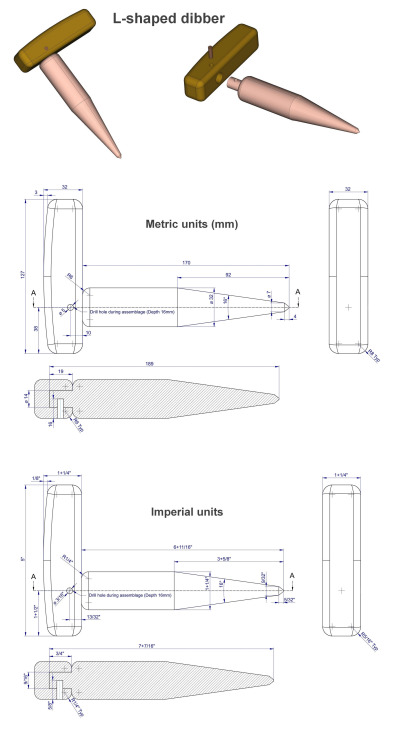
L-shaped dibber: L 202mm (7 15/16''), W 127 (5''), D 32mm (1 1/4'')
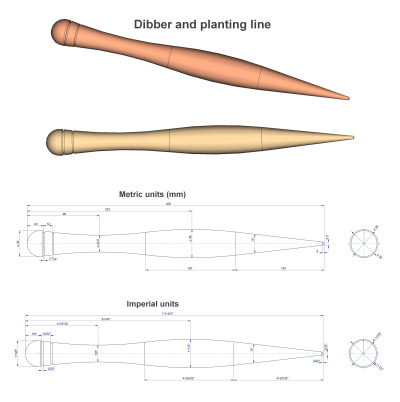
Dibber and planting line: Diameter 38mm (1 1/2''), Length 400mm (15 3/4'')
By the way, my wife and I live in the countryside; we have a large backyard with a garden where we grow fruit and vegetables ourselves as we strongly care about what we eat. At first, we didn't use the dibber. Only a few years ago I bought one at a village fair as a gift for my wife and we've been using it ever since. Don’t take me wrong, it’s not that useful, i.e., it’s not a tool that you cannot do without it, and surely not as fast as the Pottiputki planting tube, but it proved helpful in our work. Before purchasing the dibber, we used a large knife, a pointed stick or a pointed piece of a straight branch to make holes, which also did the job quite well, we must say.
If you make a dibber from quality wood (oak, ash, elm, cherry, beech ...) and protect it with several layers of oil (e.g., Danish oil), you will use it for decades, i.e., you can only be left without it if you lose it somewhere.
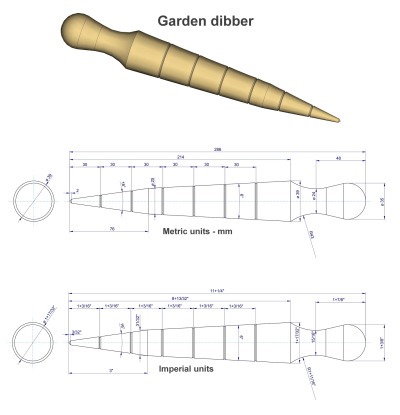
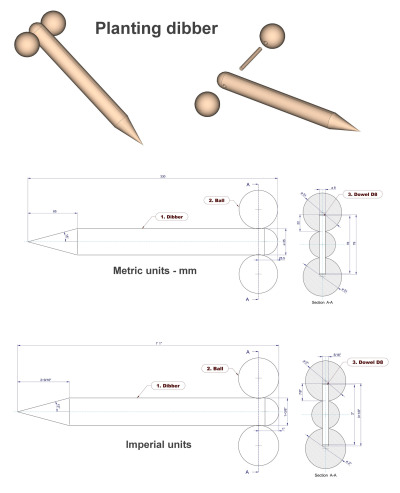
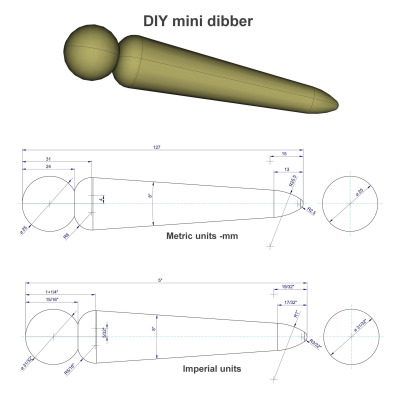
How to use dibber: push dibber into soil and swirl it arround to the size needed. The dibber should be cleaned after use to ensure longevity.
Since the dibber is made of wood, treat it as you treat all other wooden garden tools - do not leave it in damp and sunny places for a longer time period. Sand the dibber well so as to avoid any splinters to stuck in your hand.
If you want to design your dibber yourself, take care that the length should be 250-350mm (10-14in) and the diameter 30-40mm (1 3/16 – 1 9/16in). This tool is usually cylindrical in shape, and if you want it to be pleasing to the eye, you will have to make it on a lathe. If you only care about its functionality, a cylindrical shape can be obtained with a draw knife. The dibber doesn’t have to be cylindrical, but it is recommended that at least the handle is, because it makes working with it more comfortable.
We recommend that you make a few rings on the dibber, let’s say every 20 or 30 cm, so that you know the approximate hole depth.
A dibber may be an ideal gift for someone who is close to you and who likes to work in the garden; it may also be an interesting product for everyone who would like to sell their products at various village fairs and festivals.