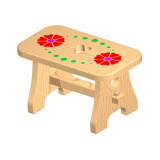
In this woodworking project we present a stool which is not only very pleasing in design, but is extremely useful.
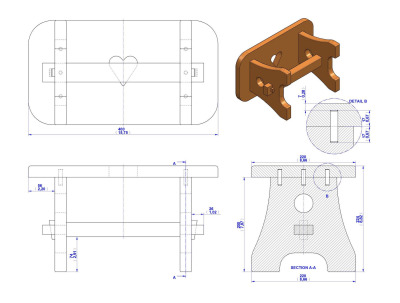
One of the commonest project for the home woodworker is to make a stool. A weekend in the workshop is all that's needed to complete this woodworking project. Detail drawings of each part are given, and if the dimensions are carefully followed, no difficulty need be experienced. No nails or screws are used in its assembly but the parts are held together securely by means of wooden dowels and wedges.

Seat: 220mm (8.66'') x 400mm (15.75''); Height: 224mm (8.82'')


Dimensions and design may be varied to suit your needs. For durability, it's best to use a hardwood for this project, preferably maple, walnut, oak or birch.
How to make this practical stool.
- Make stock list.
- Make all pieces of the required shape and size. You can save time and ensure accuracy by cutting the two side boards out together.
- Sand all sides, and round all edges.
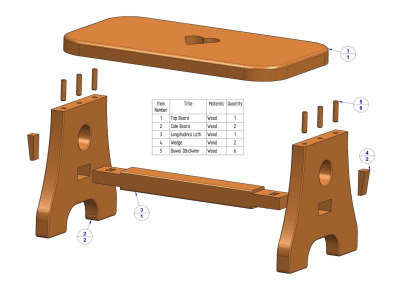
- Assemble the stool, using the exploded view.
- Set the stool on a flat surface and level the legs by sanding until the stool no longer rocks.
- Stain and finish as desired.
The decoration on Top board is suggestive only.